Create TPU Container Instance
Before creating an instance for the first time, please complete real-name authentication and recharge the account. For details, please refer to User Guide · Quick Start. The following steps correspond to the creation process of "Compute Market -> Quick Deployment" in the console.
1. Enter Compute Market and Filter Specifications
- Log in to the console and click "Compute Market" in the left navigation.
- Select the region where the instance is located at the top (supports "Shangrao", "Tianjin", etc.) and the billing mode (default pay-as-you-go, subscription will be opened gradually).
- Browse specification cards (TPU1 ~ TPU8, etc.). Each card displays CPU cores, memory, system disk and network disk capacity, and real-time unit price.
- After confirming the requirements, click "Quick Deployment" under the corresponding card to enter the configuration page.
Specification Selection Suggestions: Choose TPU1/2 for lightweight testing, TPU3/4 for regular inference, and TPU*5 and above for heavy load or parallel training.

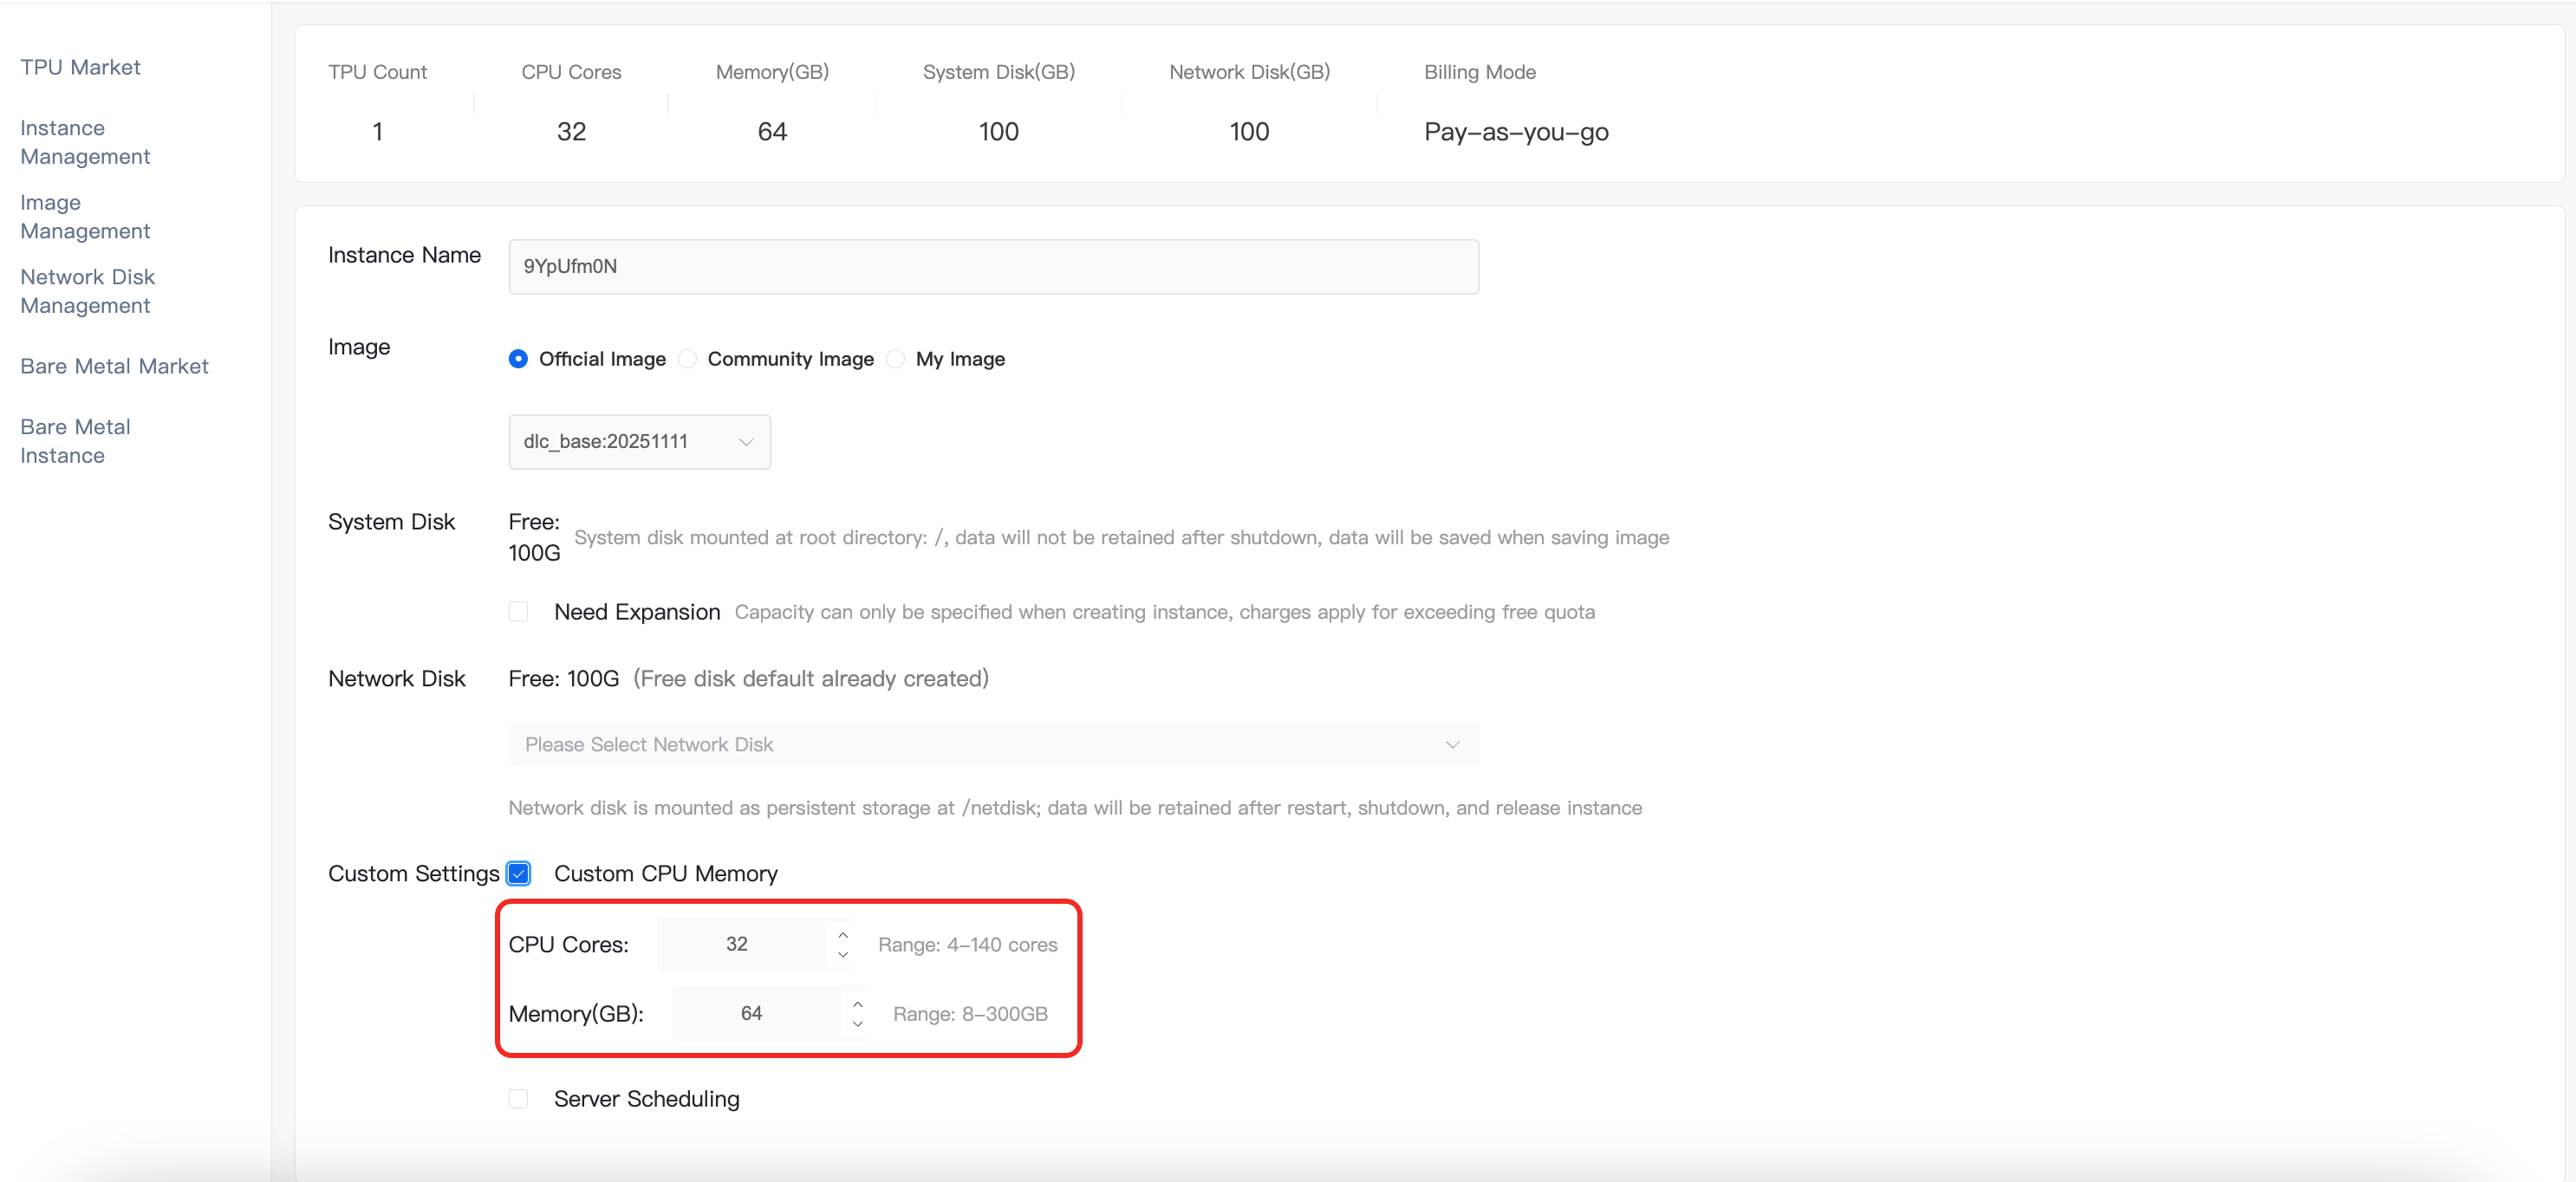
2. Configure Instance Parameters
Fill in the information as needed on the "Quick Deployment" page and view the estimated cost at the bottom of the page in real-time.
| Configuration Item | Description |
|---|---|
| Instance Name | Only supports letters, numbers, and hyphens, facilitating identification in instance management. |
| Image Source | Selectable from "Official Image", "Community Image", "My Image". Official images cover common distributions (such as ubuntu:22.04) and provide pre-installed large model inference images. Users can choose as needed; if a custom environment is required, please create an instance first and save it as an exclusive image. |
| System Disk | Default free 100 GB, mounted in the root directory; if larger capacity is needed, you can check "Expand Capacity", and the excess part will be billed by usage. |
| Network Disk | Default free 100 GB, existing as default mount point, suitable for persistent storage; you can also select an existing cloud disk from the drop-down menu. |
| Custom Configuration | If there are special requirements for CPU/memory, you can check "Custom CPU/Memory" or "Specify Server Scheduling" to meet affinity, isolation, and other scenarios. |
| Billing Mode | Switch between pay-as-you-go or subscription at the top of the page. Pay-as-you-go displays the price by hour, and subscription will deduct the fee at once when submitting the order. |
Tip: After modifying cpu/memory, discounts are no longer enjoyed, and settlement is based on the original price.
3. Confirm and Create
- After checking that the configuration and estimated cost are correct, click "Confirm Create".
- The console will prompt that the task has been issued successfully and automatically jump to the "Instance Management" page.
- When the instance status changes to "Running", you can log in via SSH (only available on intranet, public network not yet open) or Web (Jupyter/Vscode) to continue deploying business.
4. Subsequent Operations and Maintenance
- Image/Software Preparation: It is recommended to update the image or install dependencies immediately after the instance is created. Save the instance as an image when necessary for reuse.
- Storage Management: The network disk will retain data after the instance is stopped or restarted; if expansion is needed, it can be operated in "Storage Management".
- Running Status: View CPU, memory, TPU, and cost summary in Instance Management, supporting operations such as start, stop, restart, delete, etc. Please back up important data before deleting the instance.
If you encounter prompts such as image unavailability or insufficient quota during the creation process, you can go to "Image Management" and "Storage Management" to check resources, or contact technical support for assistance.