OpenClaw ChatApp Integration
When creating OpenClaw, you can configure a ChatApp to communicate with it. Currently, after deployment, the ChatApp cannot be configured in the OpenClaw dashboard — it can only be configured during creation. If you didn't configure a ChatApp during creation, you can only interact through the chat in the dashboard. If you want to experience ChatApp interaction, please enter the relevant configuration during creation. Currently, only Feishu (Lark) is supported.
Please strictly follow the configuration order below, otherwise issues may occur.
If you don't need to configure a ChatApp, you can skip to the Configure Model and Channel for OpenClaw section.
DingTalk Integration
https://open-dev.dingtalk.com/fe/app?hash=%23%2Fcorp%2Fapp#/corp/app
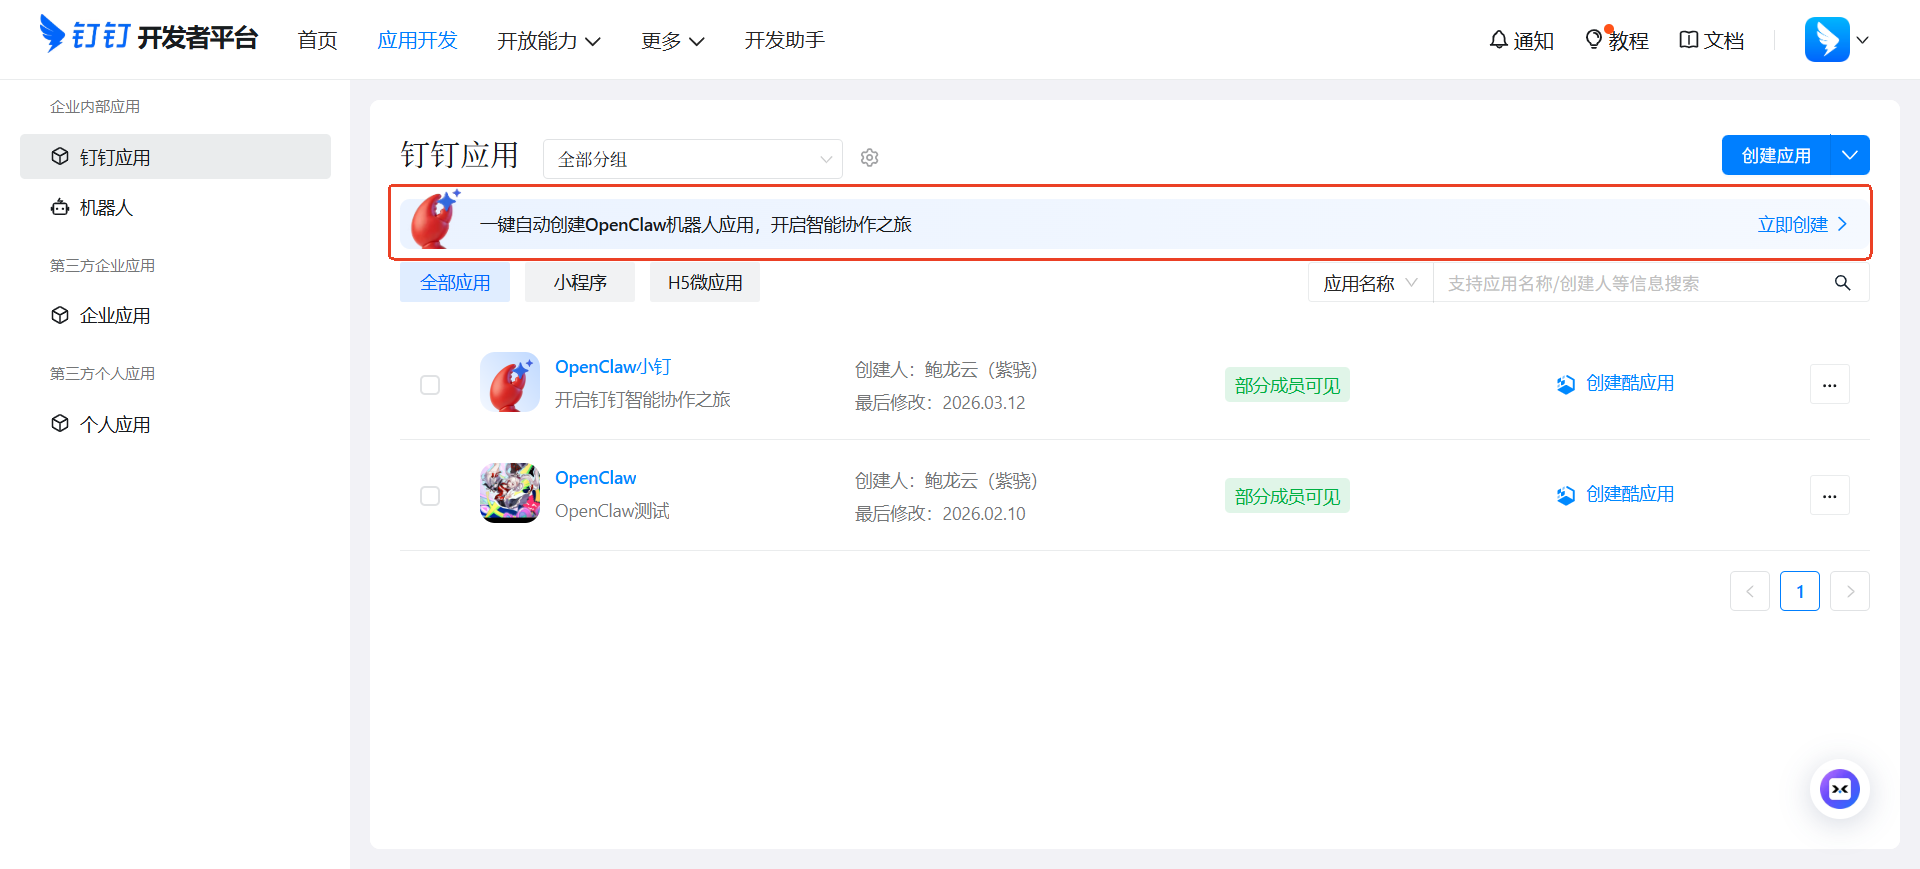
Go to the DingTalk Developer Platform and click to automatically create an OpenClaw bot application with one click.
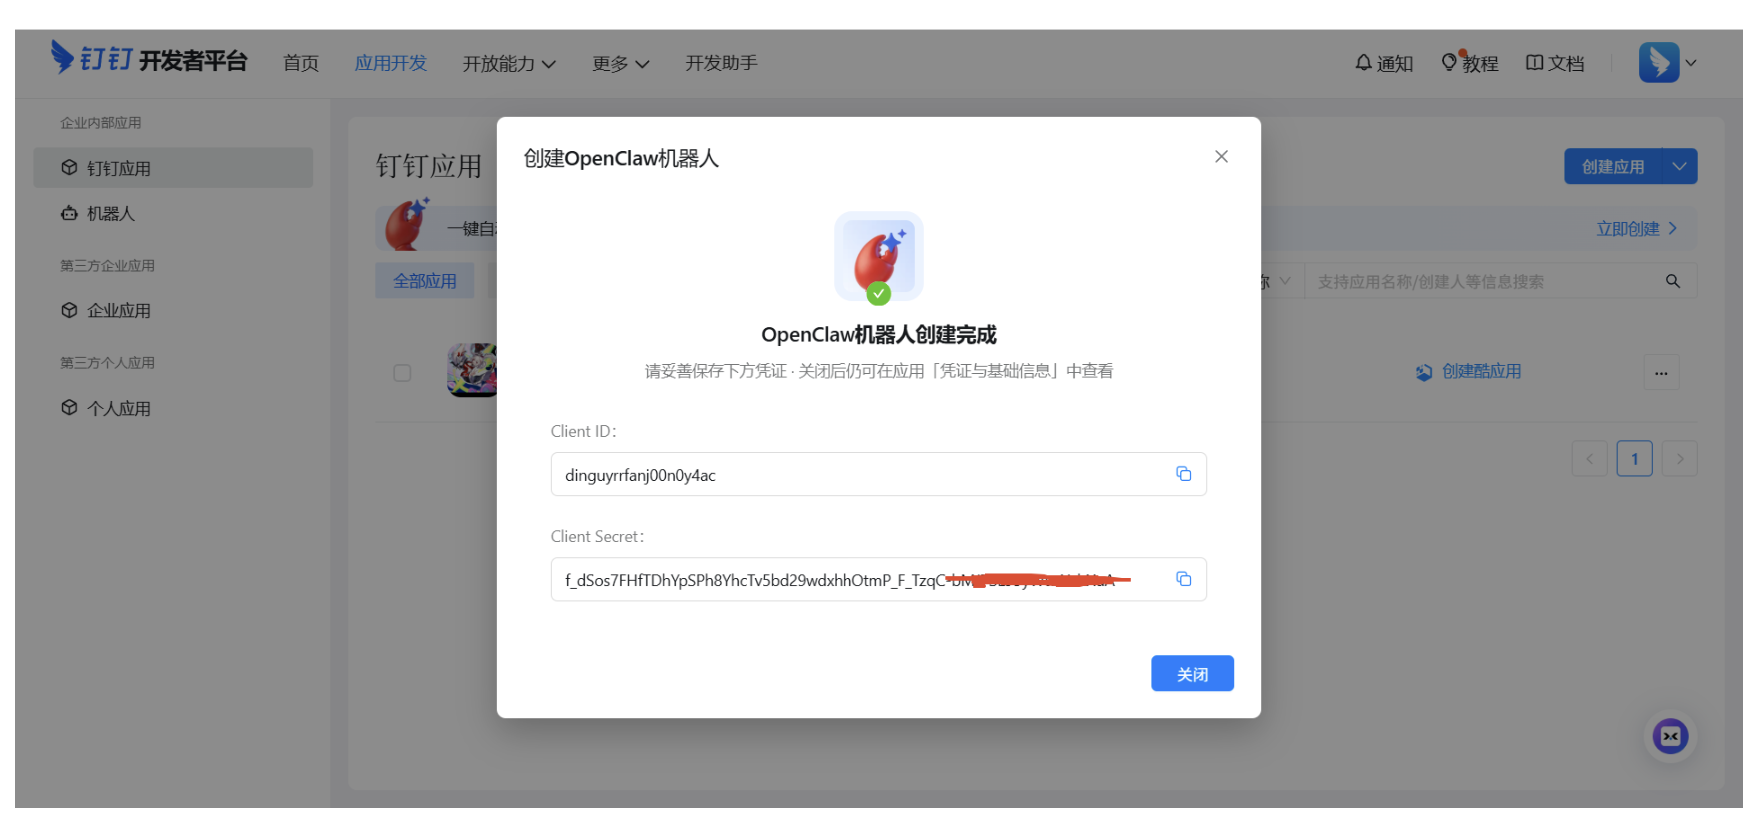
Note down the Client ID and Client Secret.
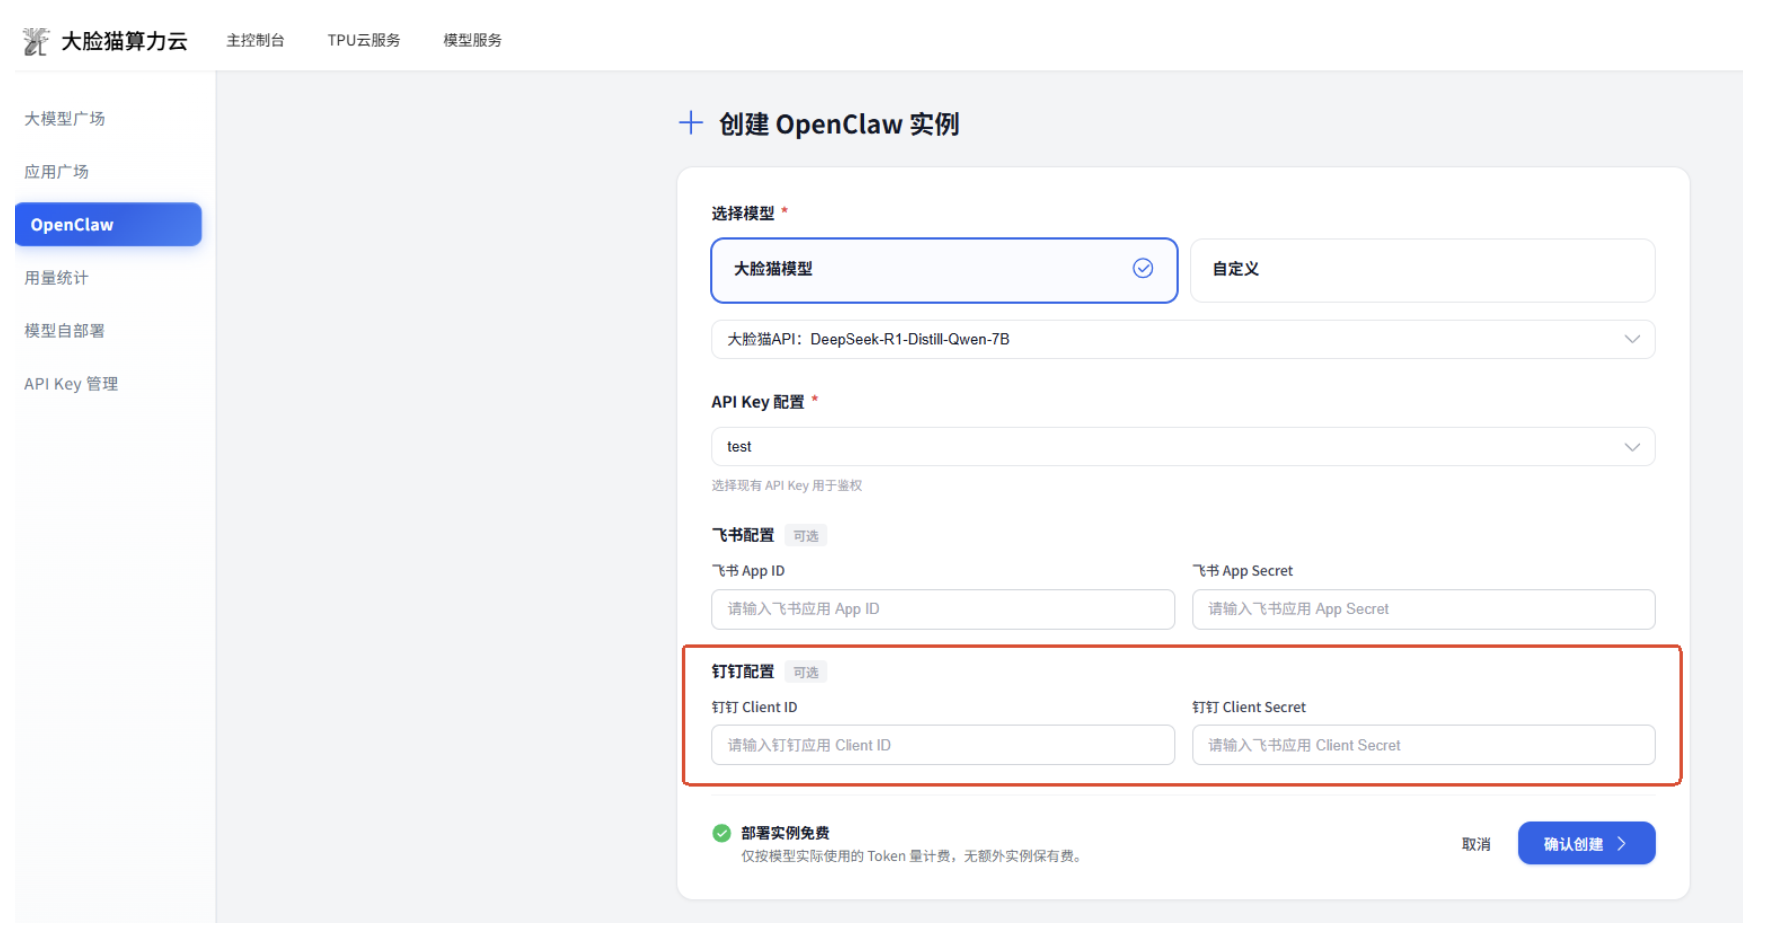
Fill in the corresponding Client ID and Client Secret when creating an OpenClaw instance.
Search for the app name in DingTalk to open the OpenClaw application.
Feishu (Lark) Integration
Among domestic ChatApps, Feishu has the best compatibility with OpenClaw. QQ doesn't support file transfer, and there are unsolvable issues with scheduled task APIs. DingTalk has a cumbersome bot creation review process. WeCom (WeChat Work) requires submitting various documents during creation. Overall, Feishu has the most complete integration and supports advanced features like Feishu's multidimensional spreadsheets and cloud documents (built-in skills already available).
Create a Feishu Custom Enterprise App
First, it's recommended to create a personal Feishu account, which will save you review time. You need to log in to the Feishu Open Platform with your Feishu account. After logging in, click "Create Custom Enterprise App".
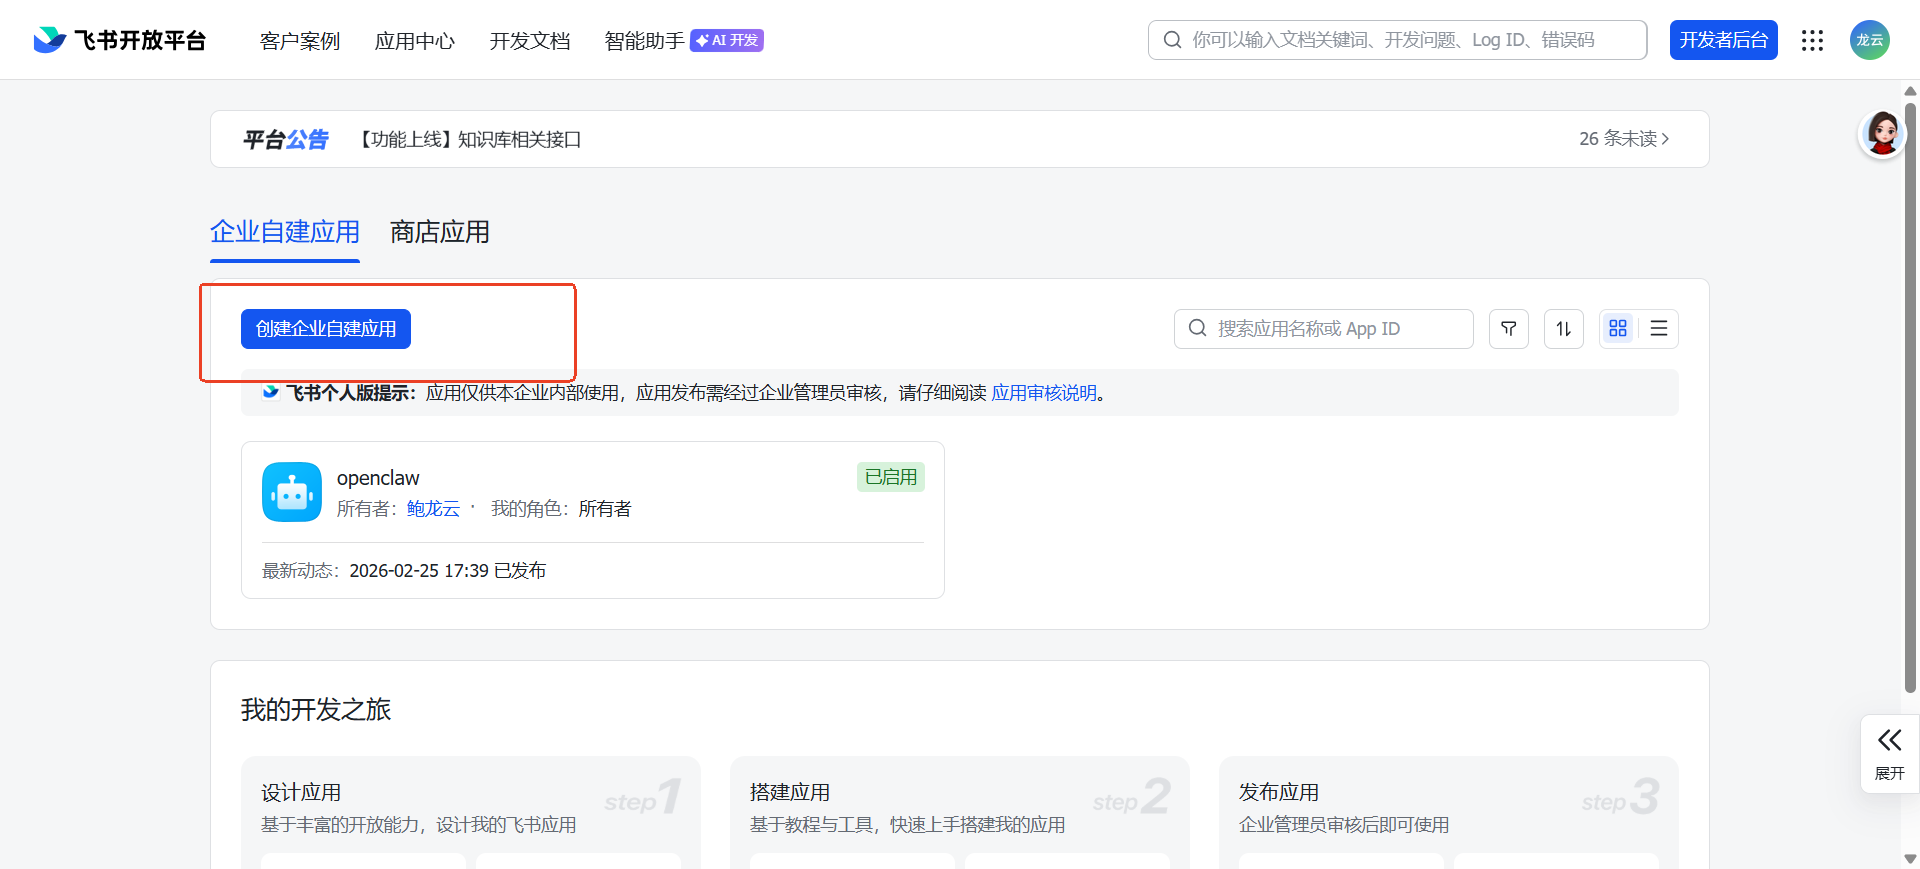
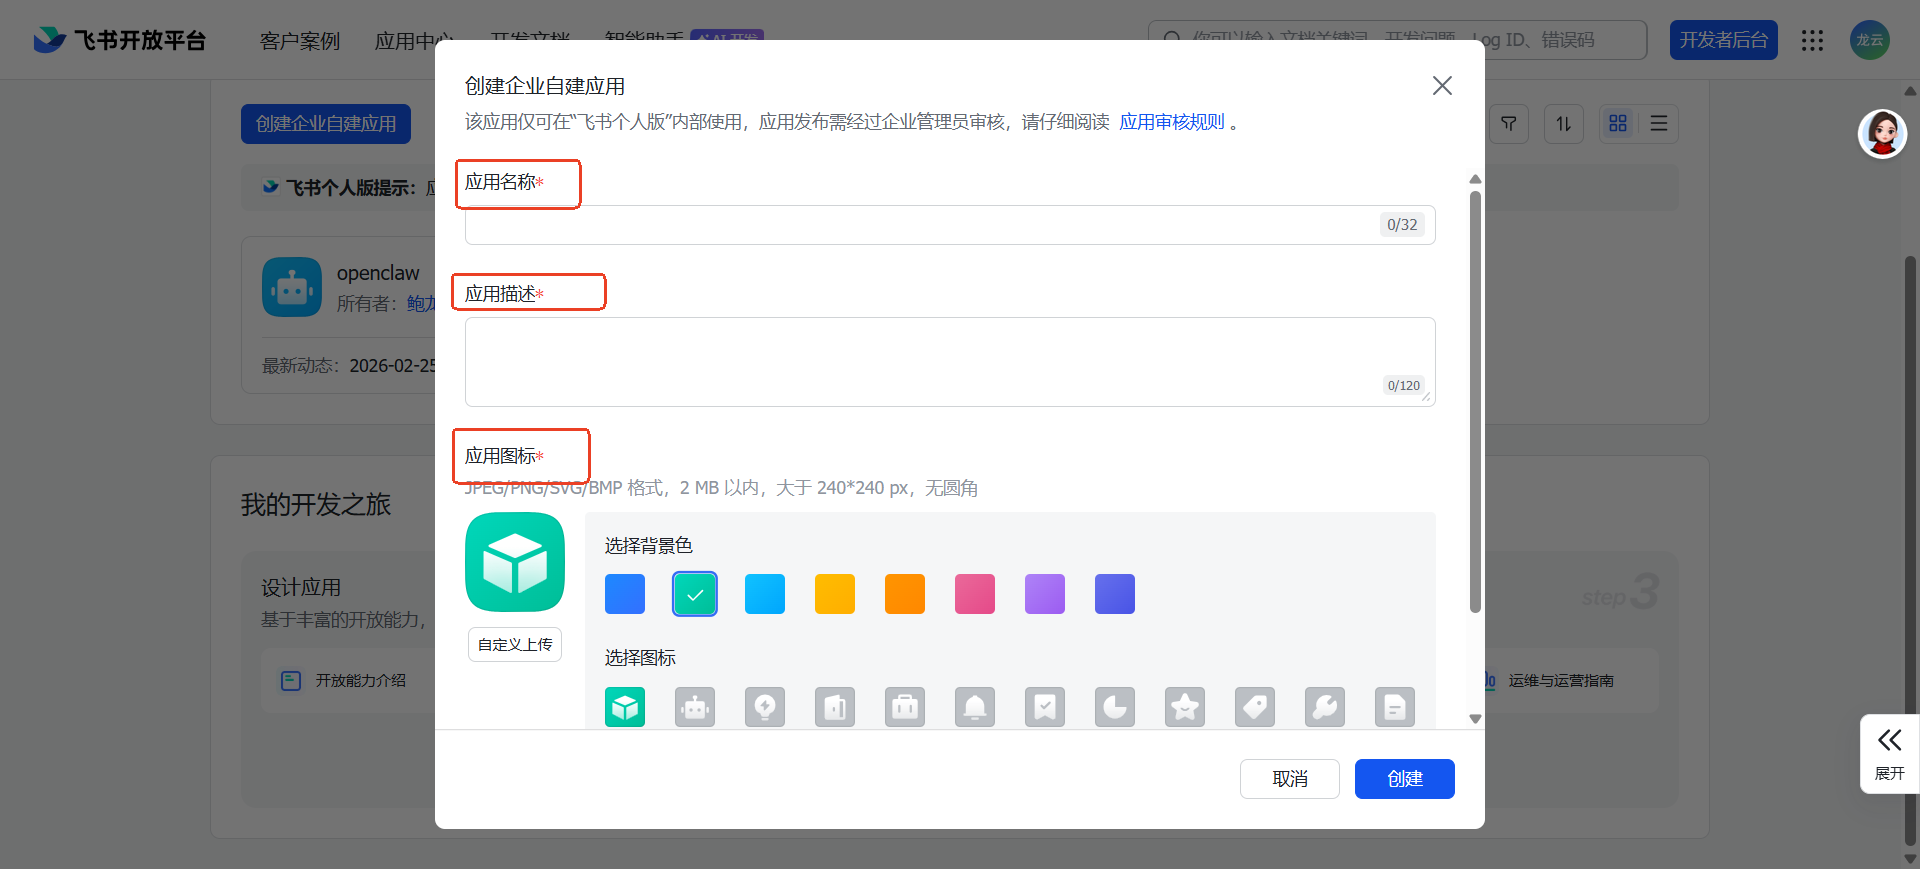
Fill in the App Name (e.g., "OpenClaw Assistant"), App Description, select an App Icon, and click the Create button to enter the app management page.
Add Bot Capability
On the app management page created in the previous step, find and click Add App Capabilities in the left navigation bar. In the pop-up list, select Bot, and click Add.
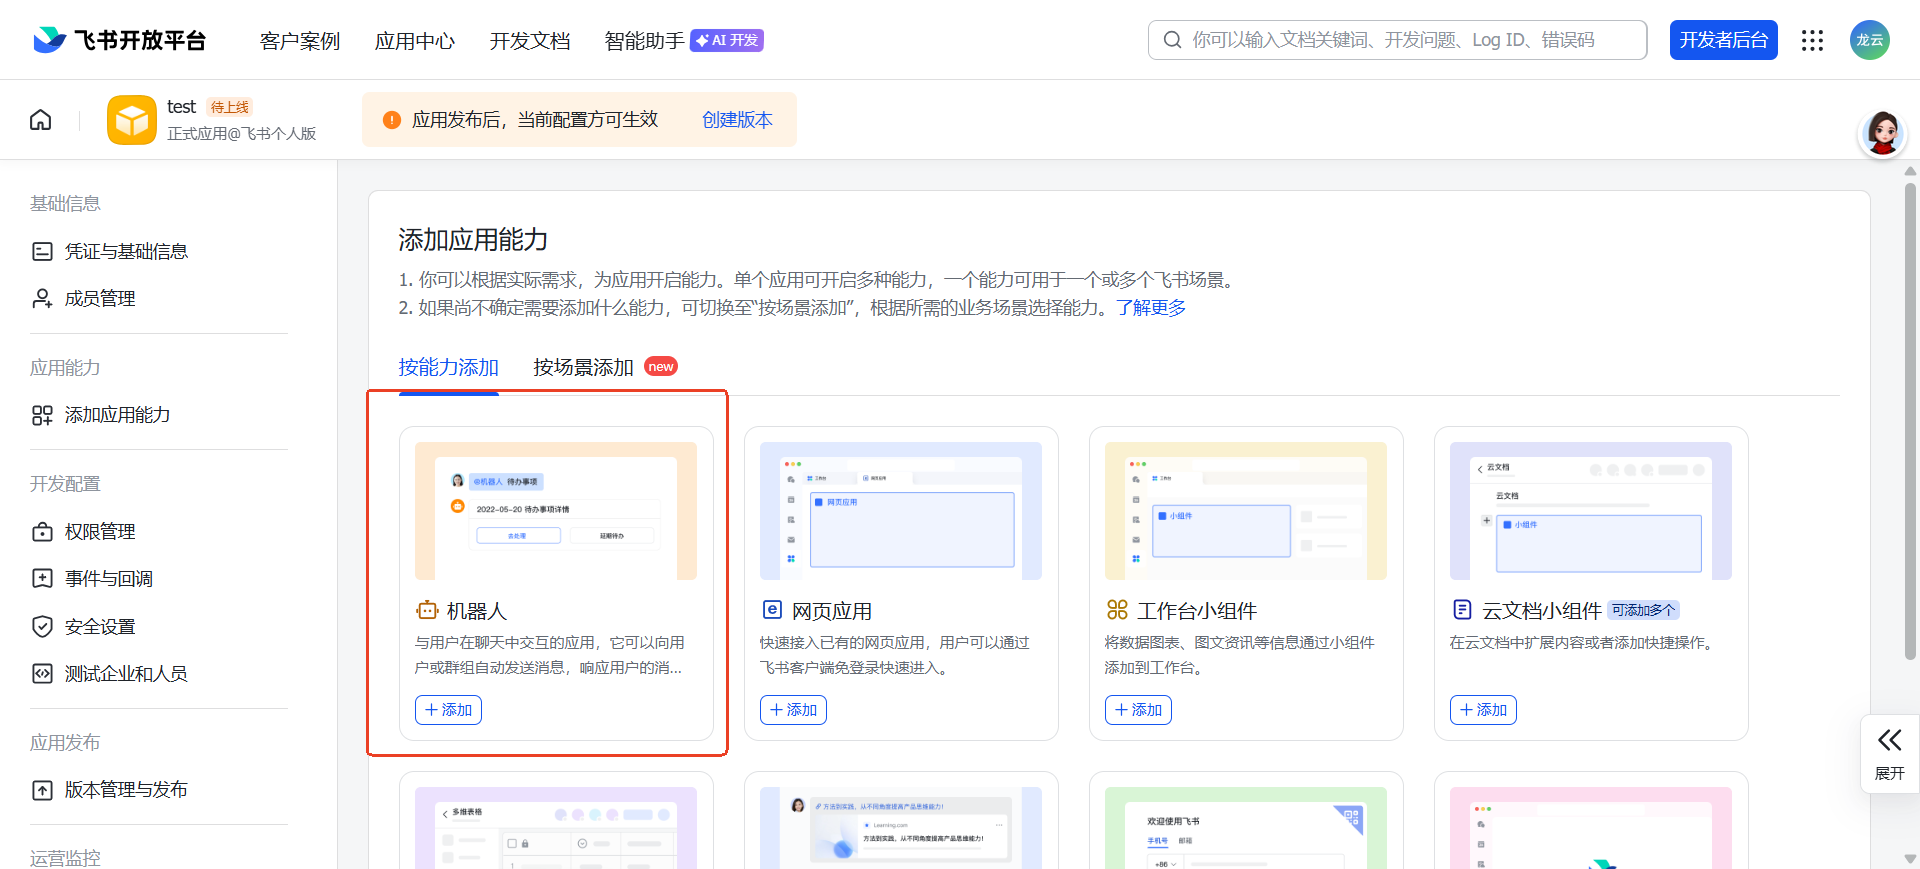
Tip: After adding the bot, you can hold off on publishing and publish everything together after other configurations are complete.
Get App ID and App Secret
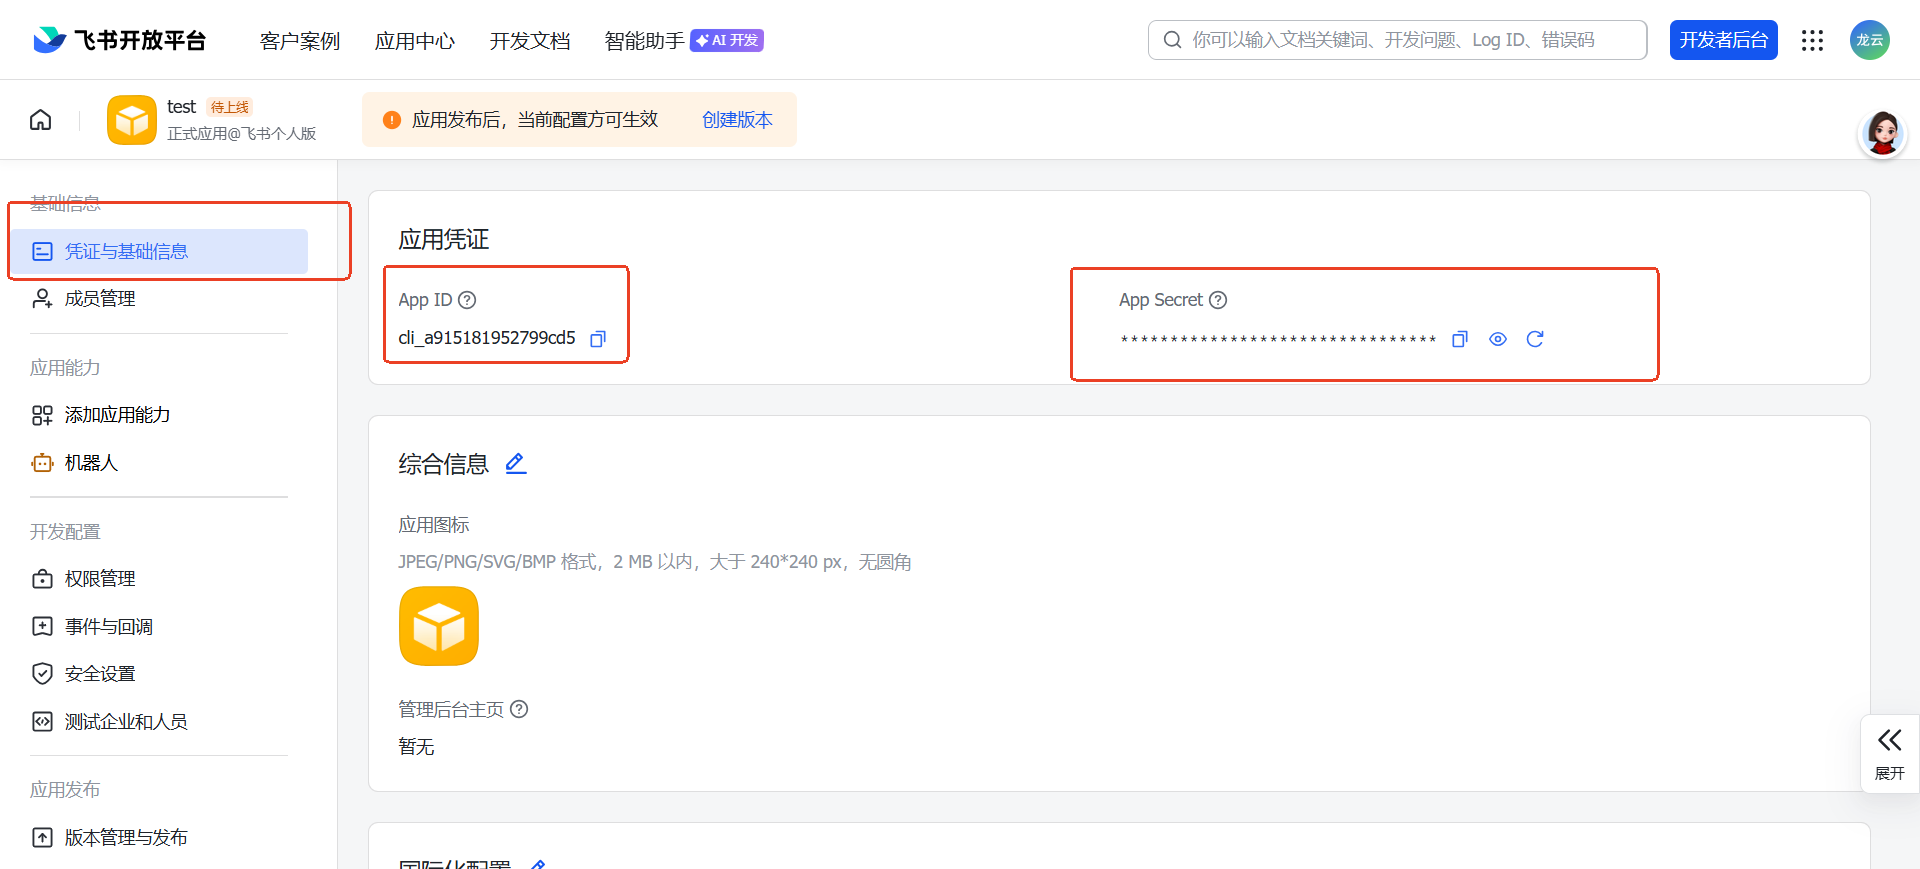
In the left navigation bar, find "Credentials & Basic Info" and click to enter. On the page, find the "App ID" and "App Secret" parameters, click the "Copy" button on the right side of each, and save them to a personal notepad or memo (be careful about data security, do not leak them). These will be needed in subsequent steps.
Configure Model and Channel for OpenClaw
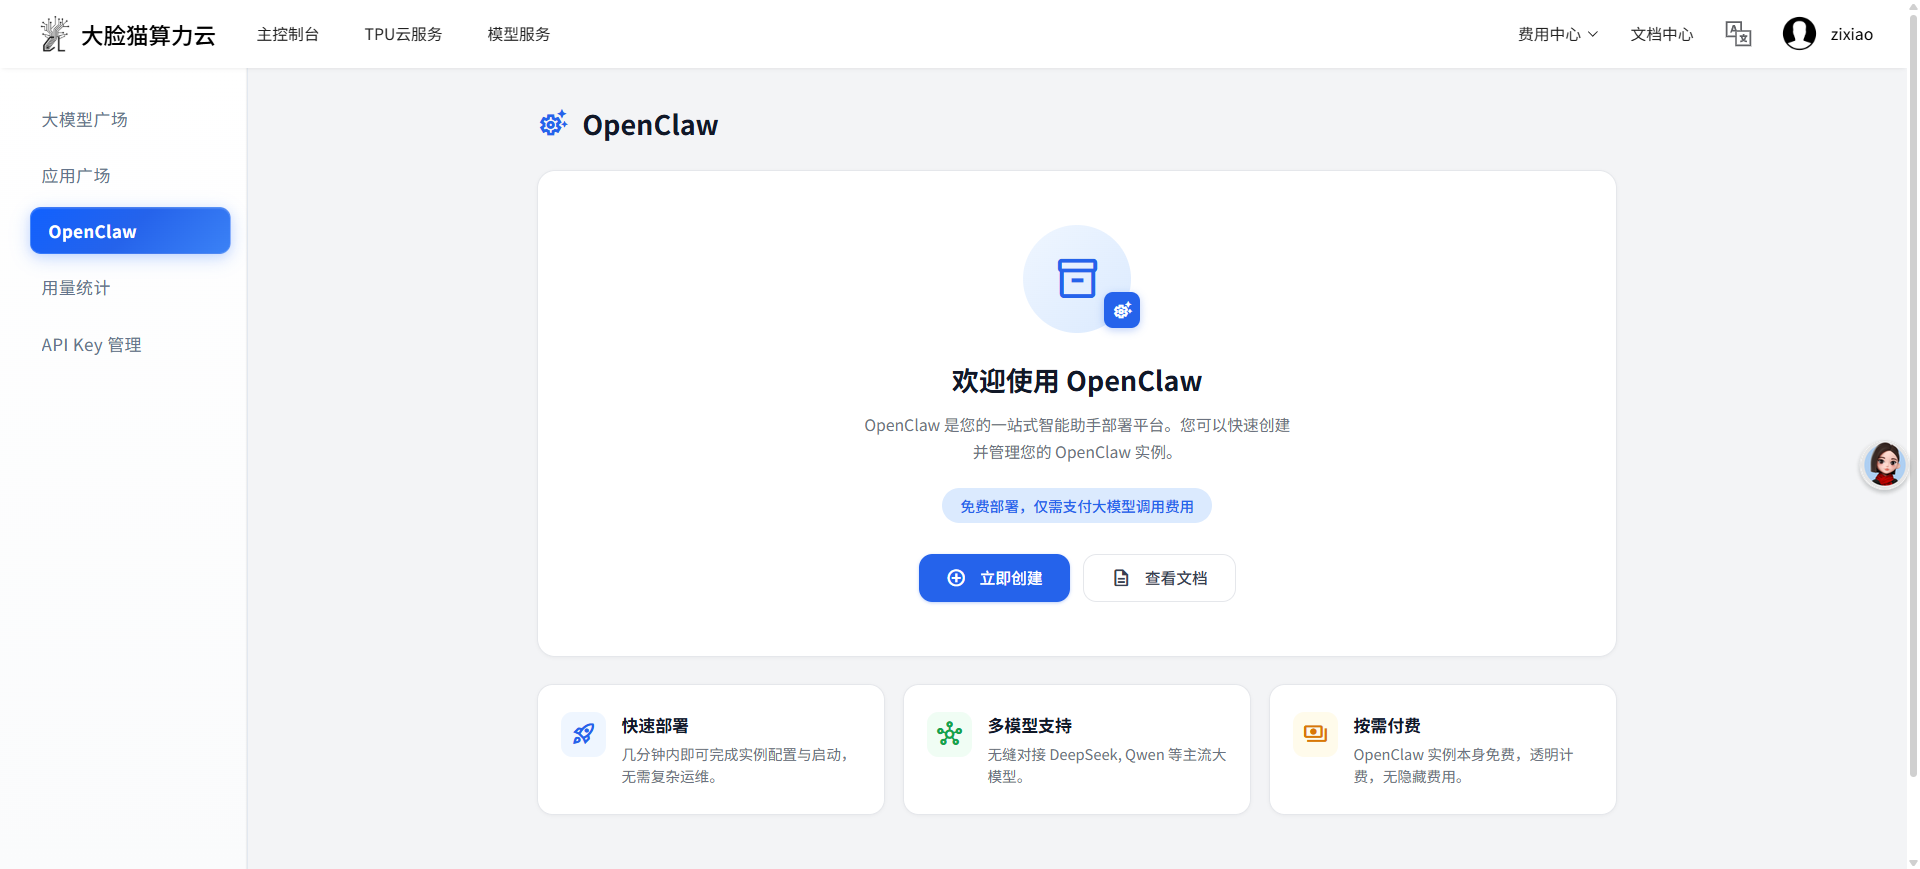
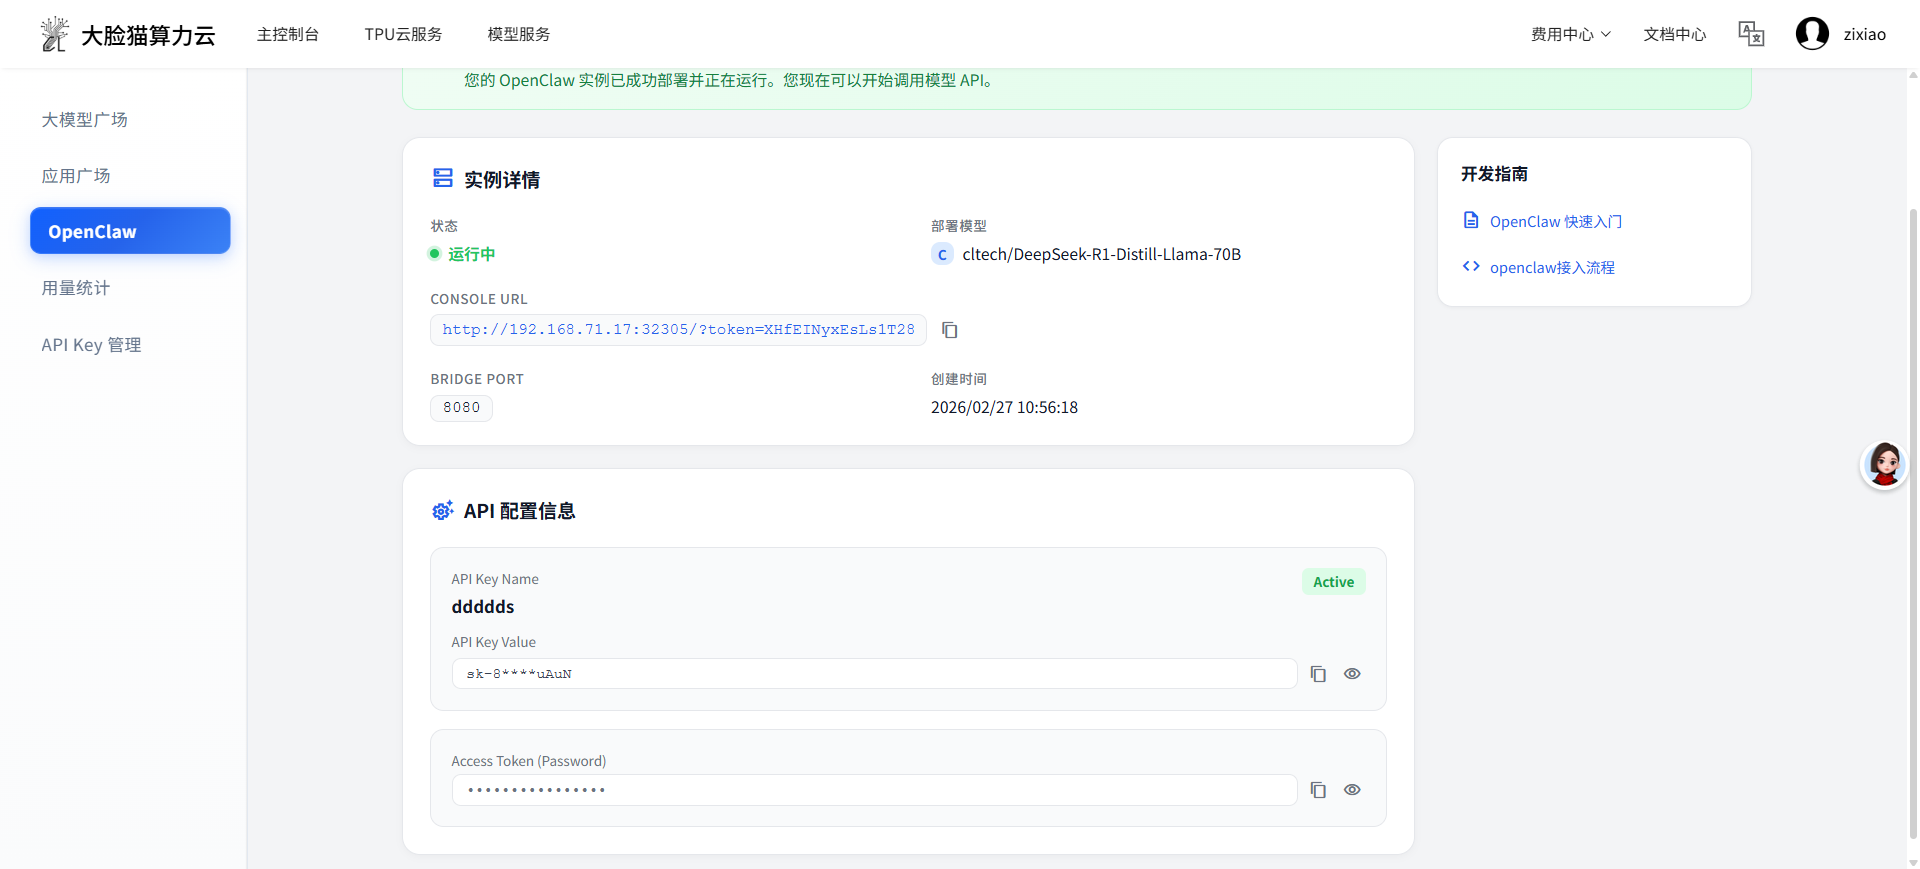
Next, you need to deploy OpenClaw. Go to DaLianCat Cloud - Model Service - OpenClaw
Click [Create Now]
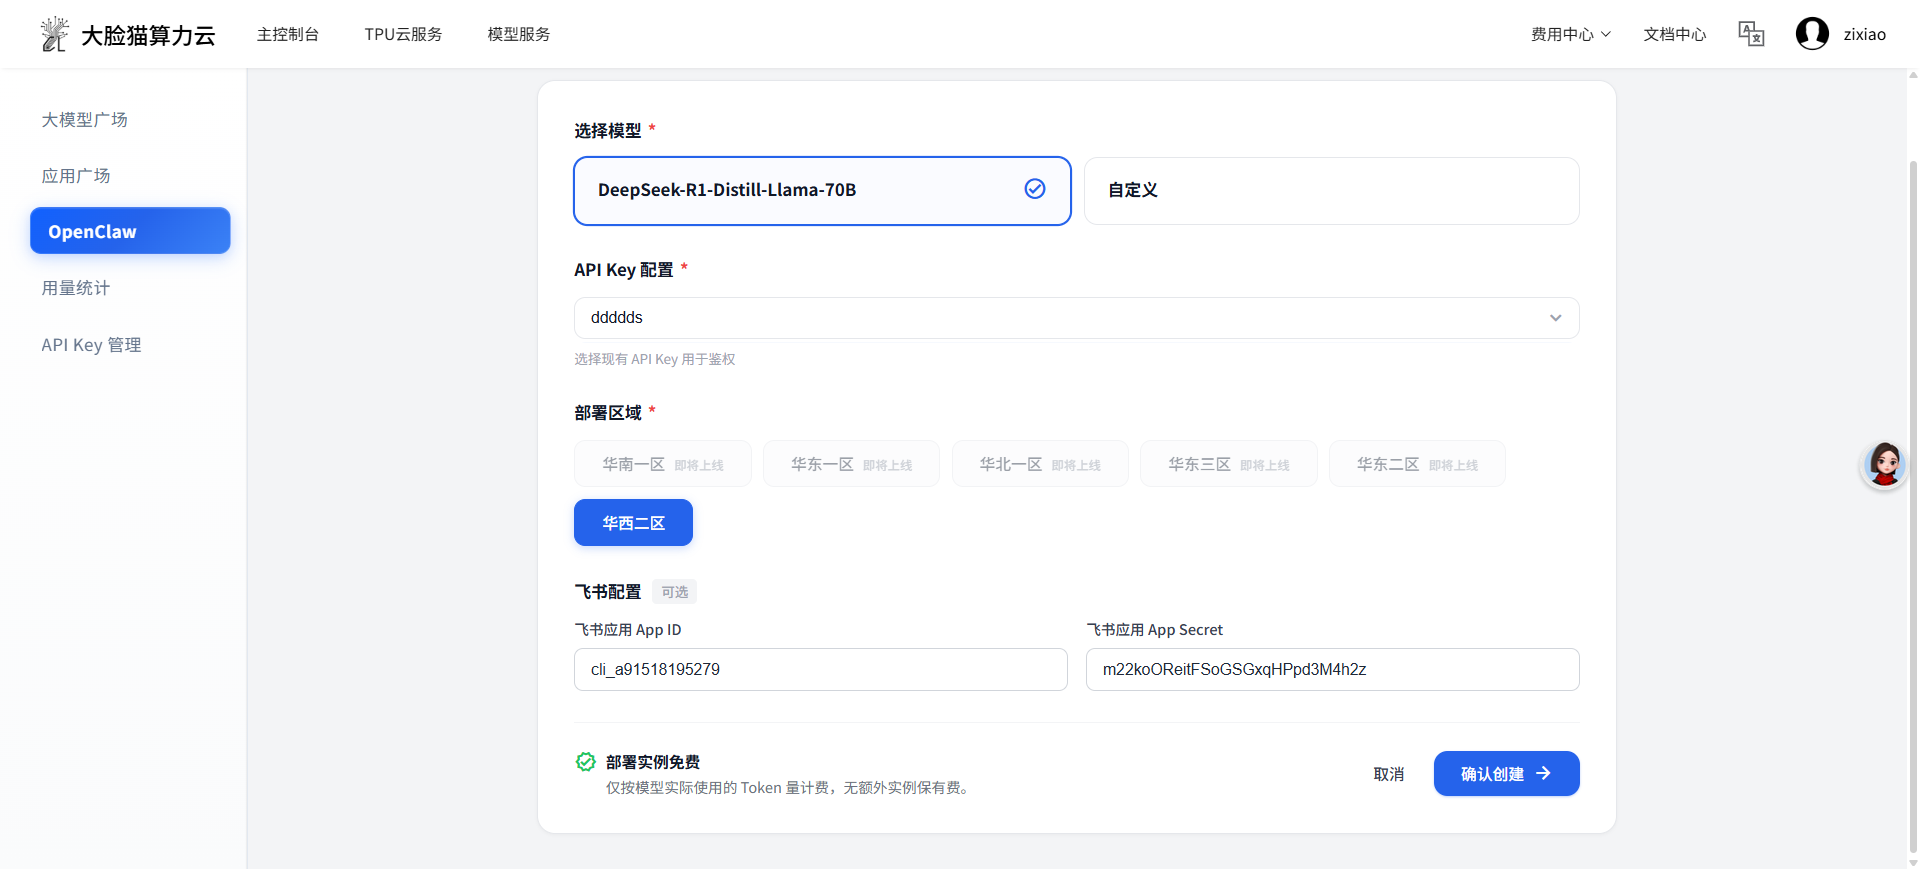
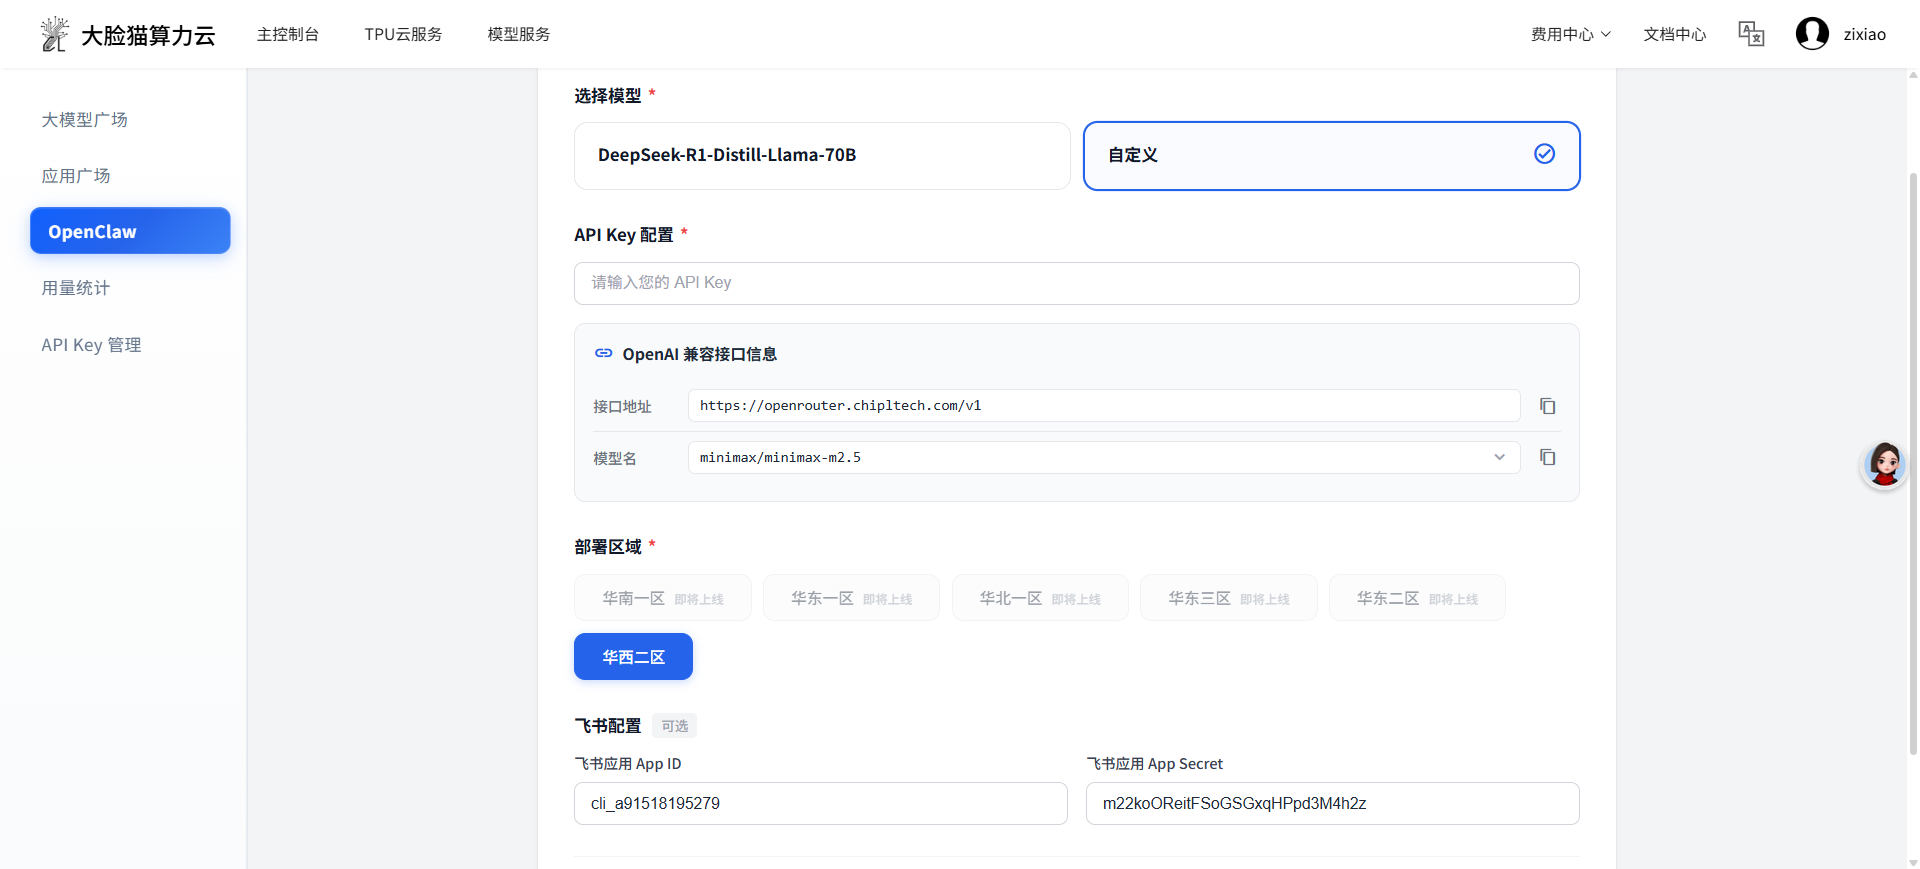
On the instance configuration page, we provide 2 model options:
Our own model DeepSeek-R1-Distill-Llama-70B. After selecting the model, please also select the corresponding API key.
Company-provided NEW API models, address: https://openrouter.chipltech.com/. The API endpoint is fixed and cannot be modified. Currently available models: minmax2.5 (default), claude-haiku-4.5, gemini3flash, Glm4.7. You need to enter the token key from NEW API.
If you don't need to experience ChatApp interaction at this point, you can click Create. If you do, please see the channel configuration below.
Channel Configuration (Configure Feishu Bot App ID and App Secret)
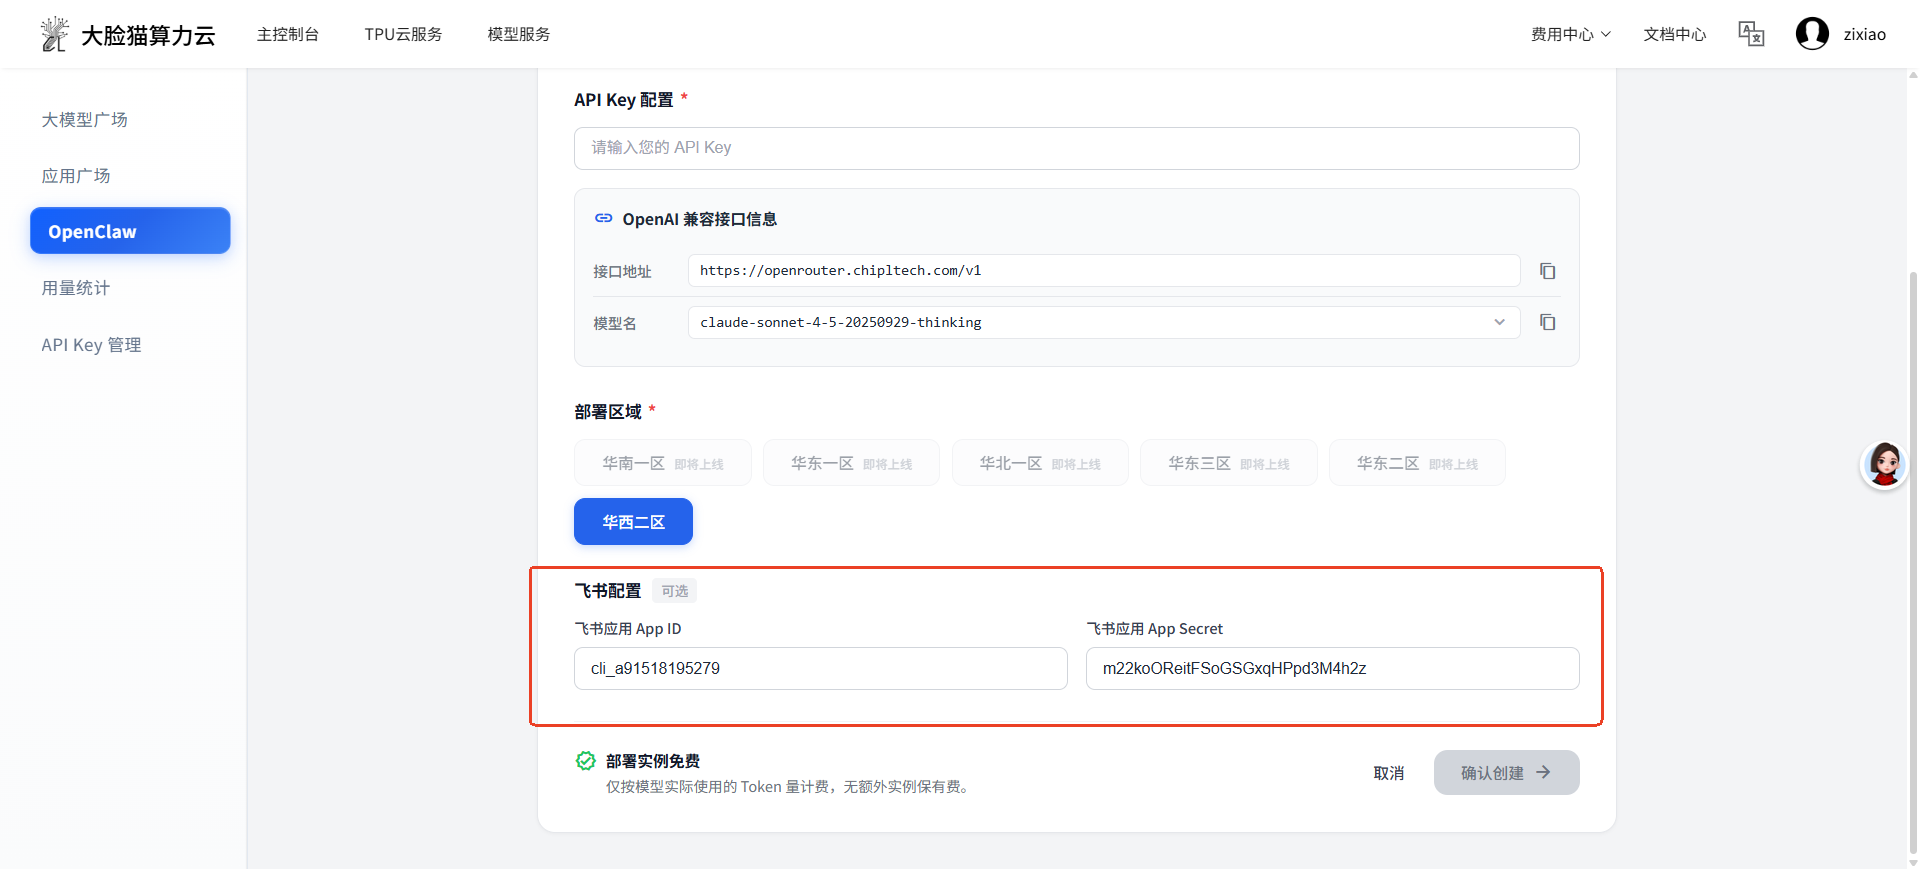
Enter the Feishu bot's App ID and App Secret obtained in the previous steps, click Apply and Confirm to execute the operation. Wait a few seconds until the page shows "Running" to complete the configuration.
Tip: After clicking "Confirm Creation", the app management page will only show "In Use" status and will not display the configured App ID and App Secret.
Feishu Bot Configuration
Event Configuration
On the Feishu App Management Page, find "Events & Callbacks" in the left navigation bar and click to enter. In the "Event Configuration" tab, select "Receive Events via Long Connection", and click Save.
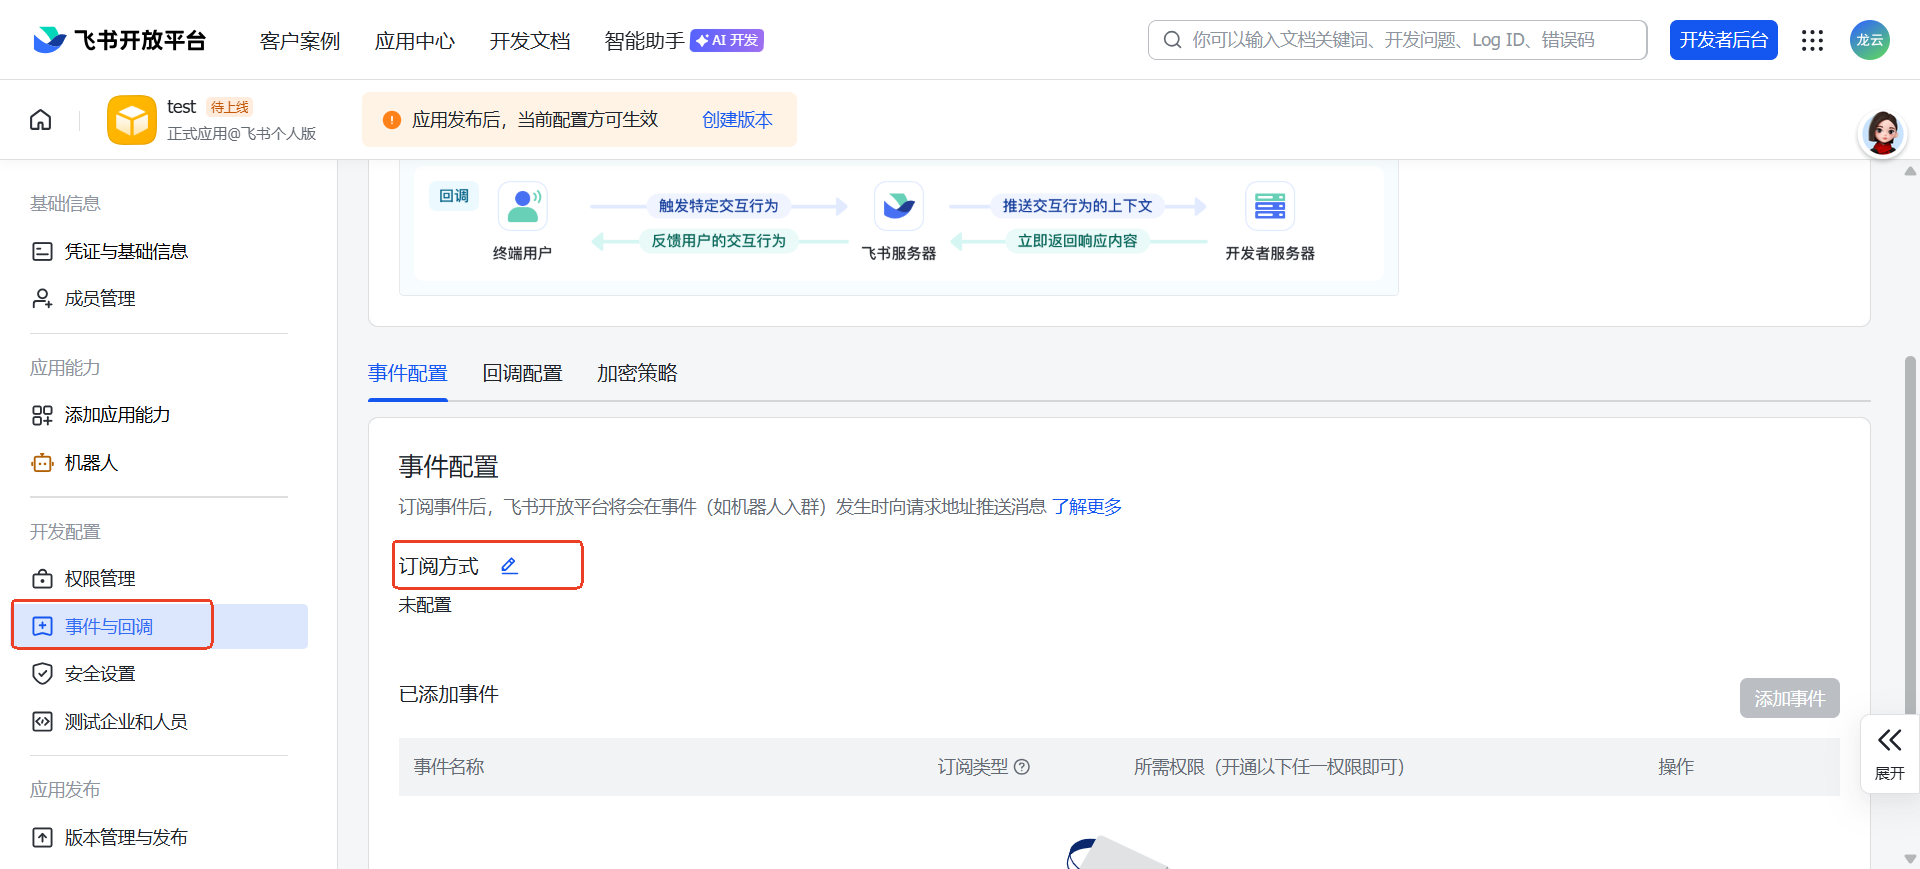
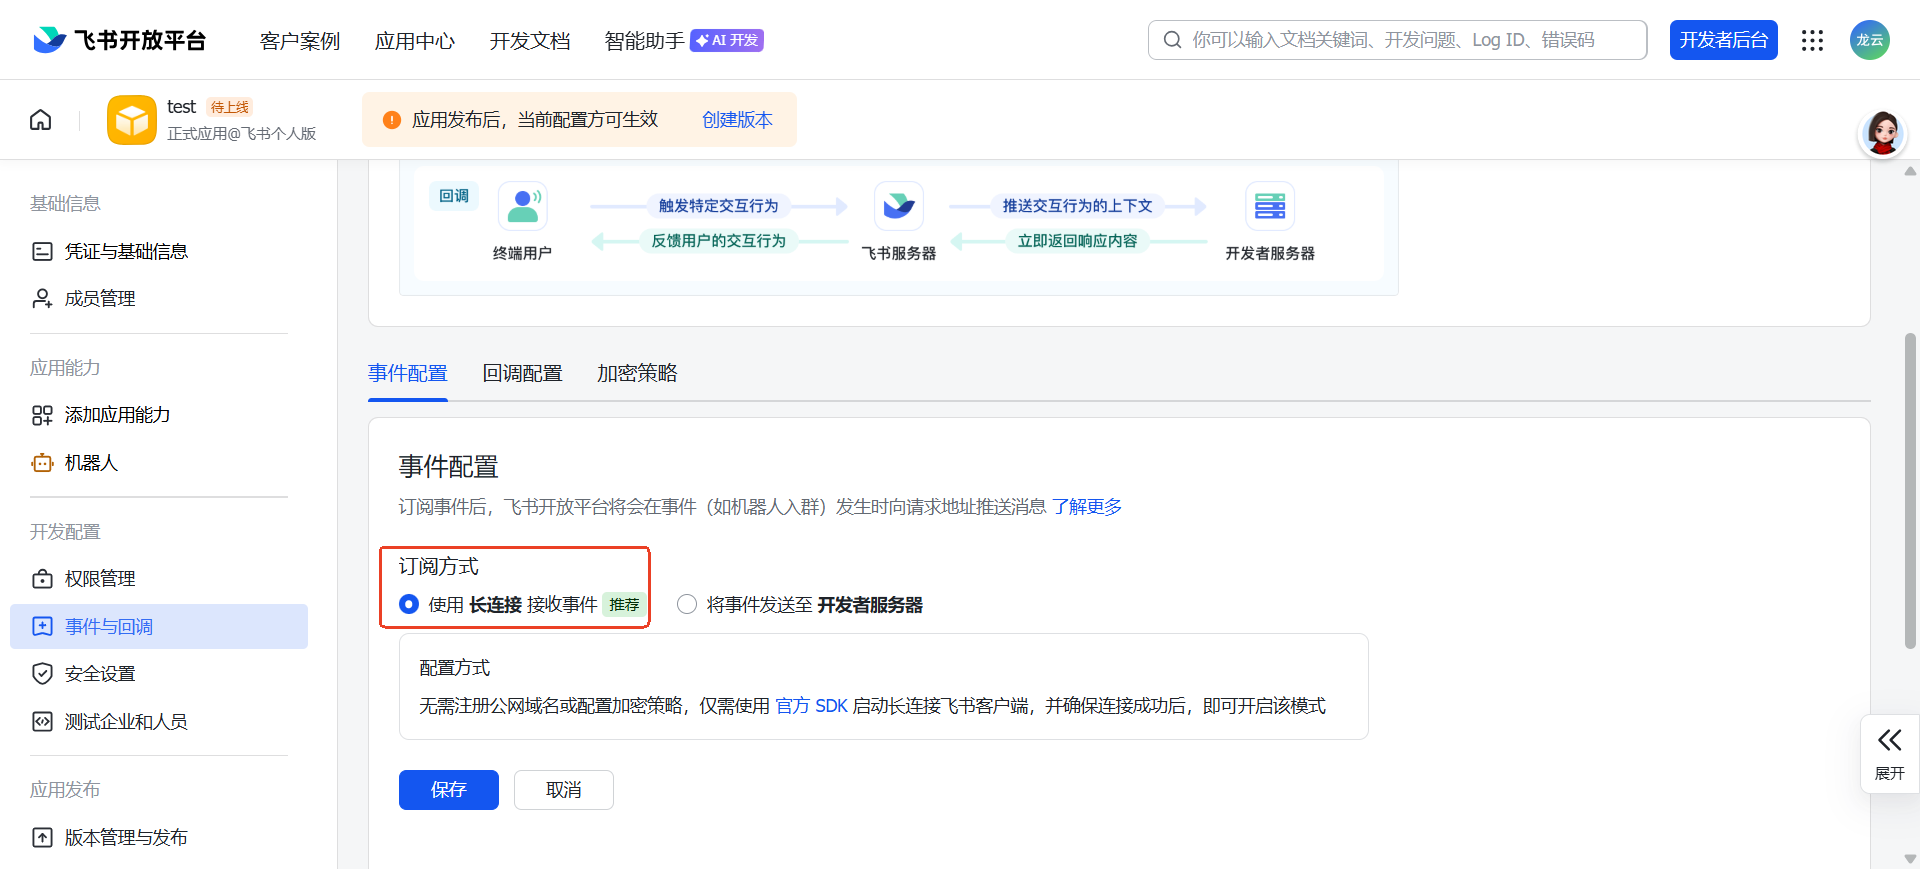
Warning: If this step shows an error "Application has not established a long connection", please check whether the bot's App ID and App Secret in the OpenClaw channel configuration from the previous steps are correctly configured. If the event configuration saves successfully, you can proceed directly to the "Add Events" step below.
Add Events
Click "Add Event" on the "Event Configuration" page. In the pop-up list, search for and add "Receive Messages", click "Confirm Add", and follow the prompts to confirm permission activation.
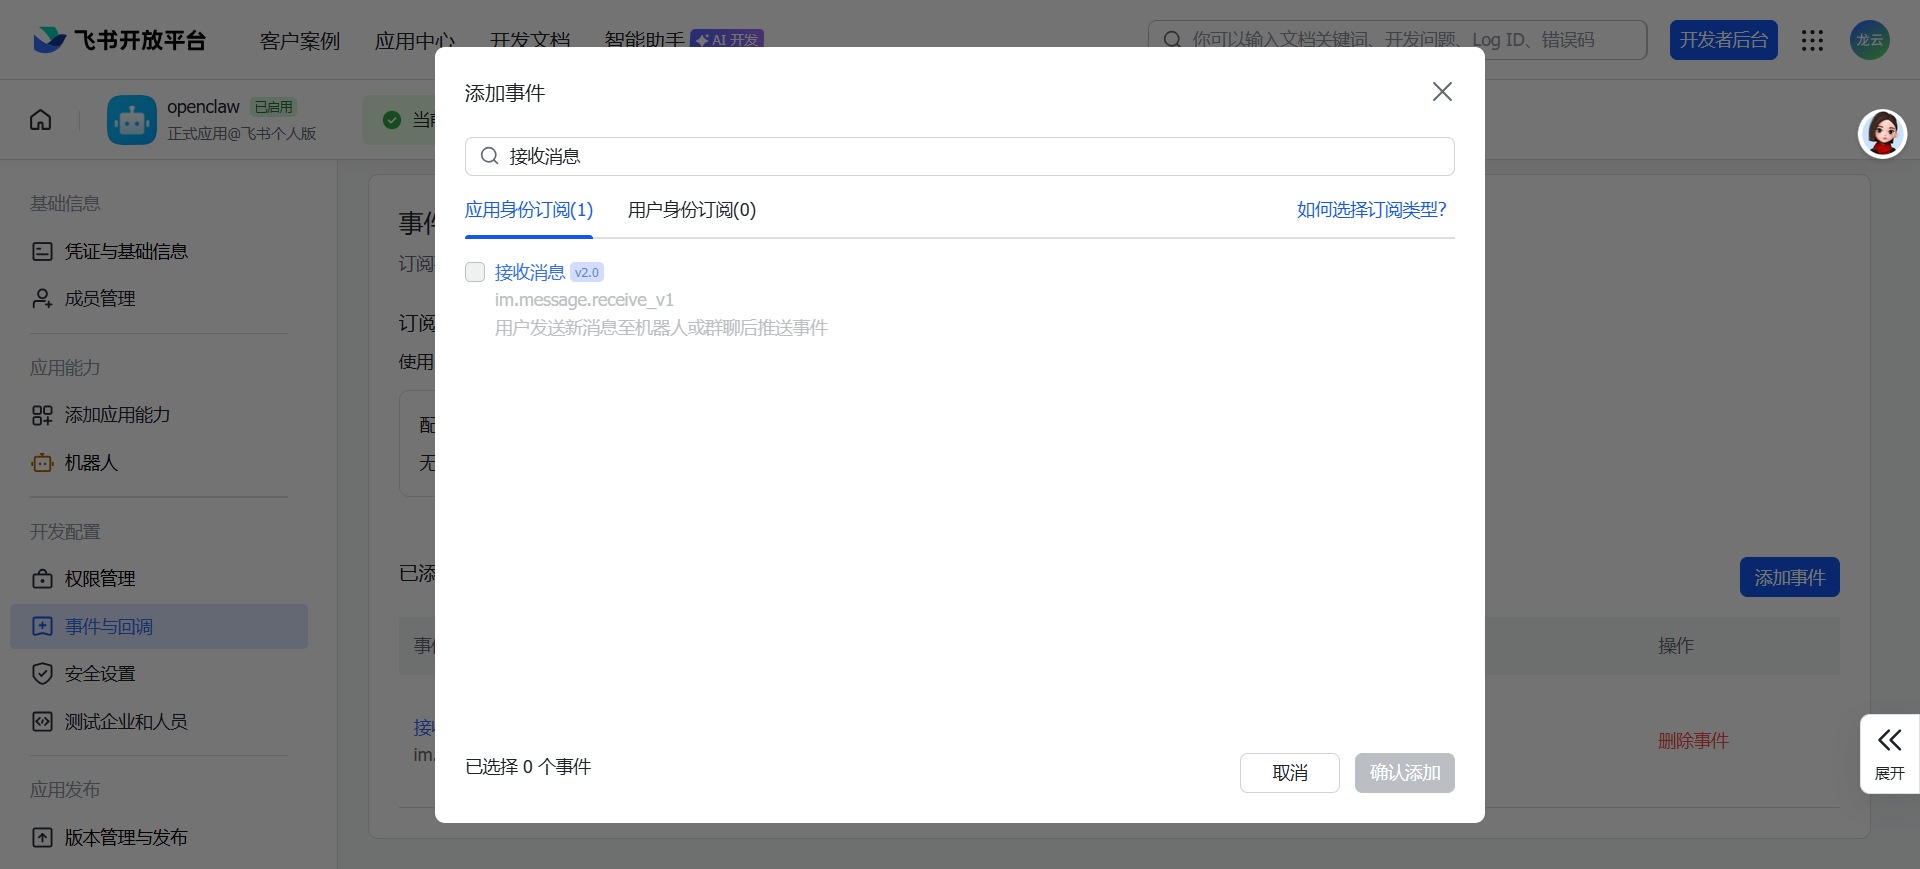
(Recommended) If you want to add the Feishu bot to group chats, you can follow the same steps to add more group-related permissions, mainly including "Message Read", "Bot Joins Group", and "Bot Removed from Group". Otherwise, skip this step.
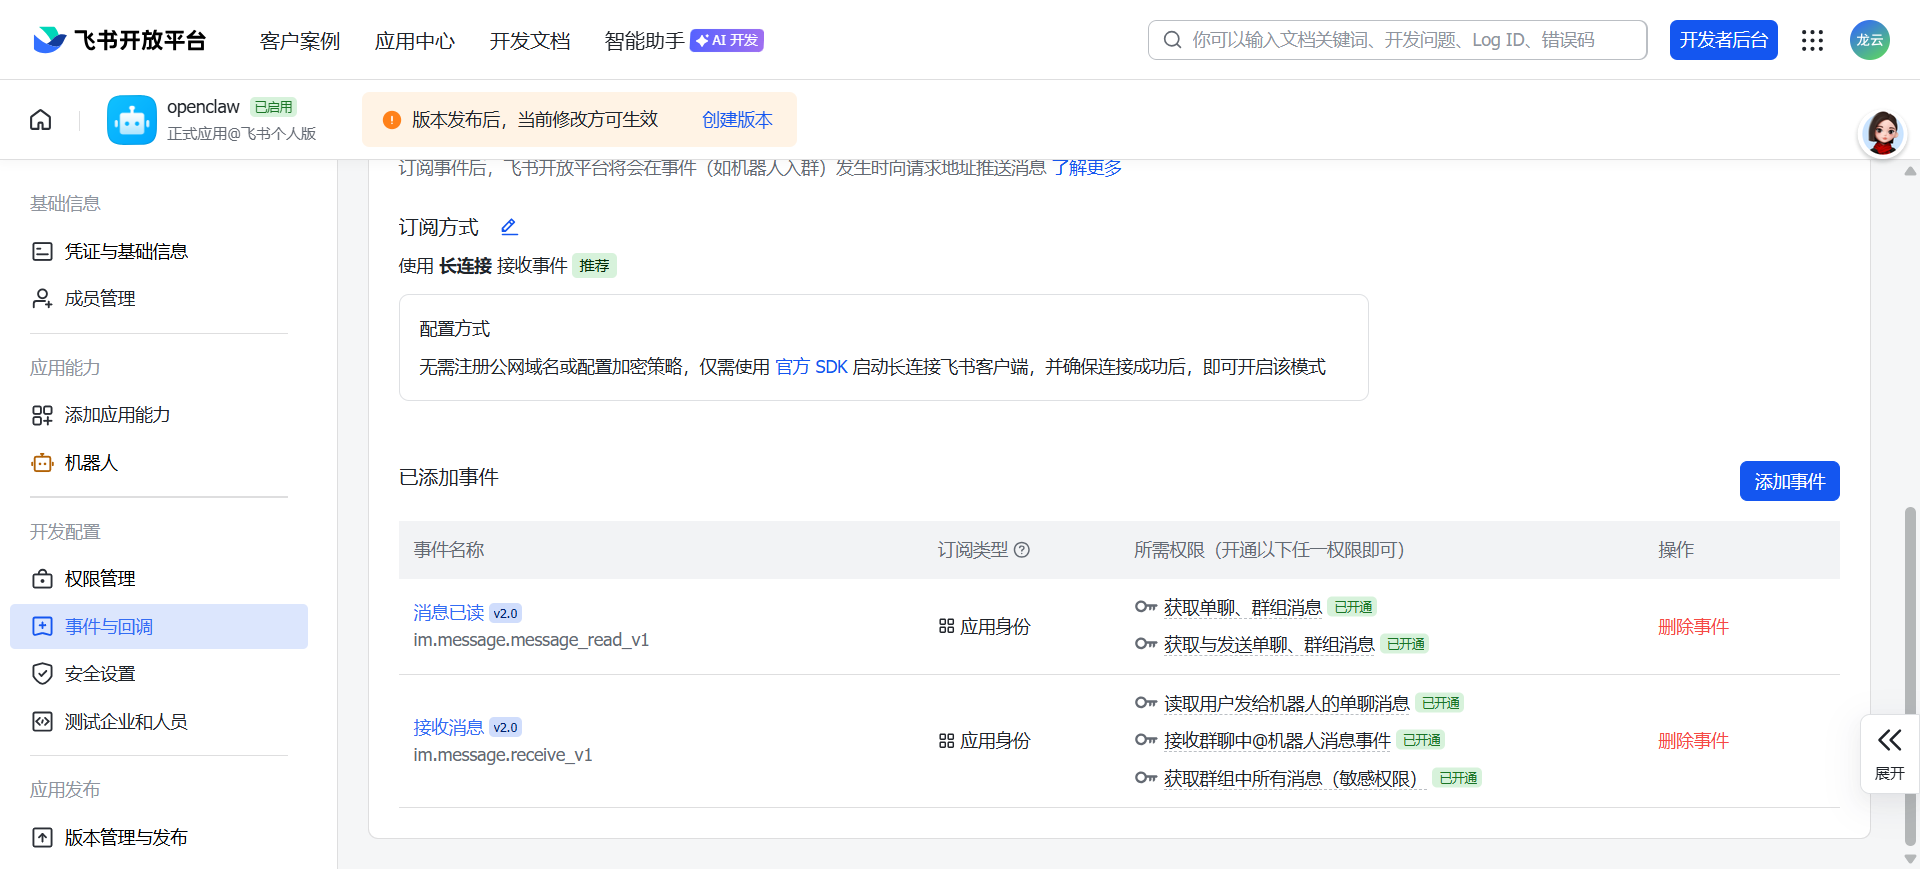
After adding, you can view the added events in the list on the current page.
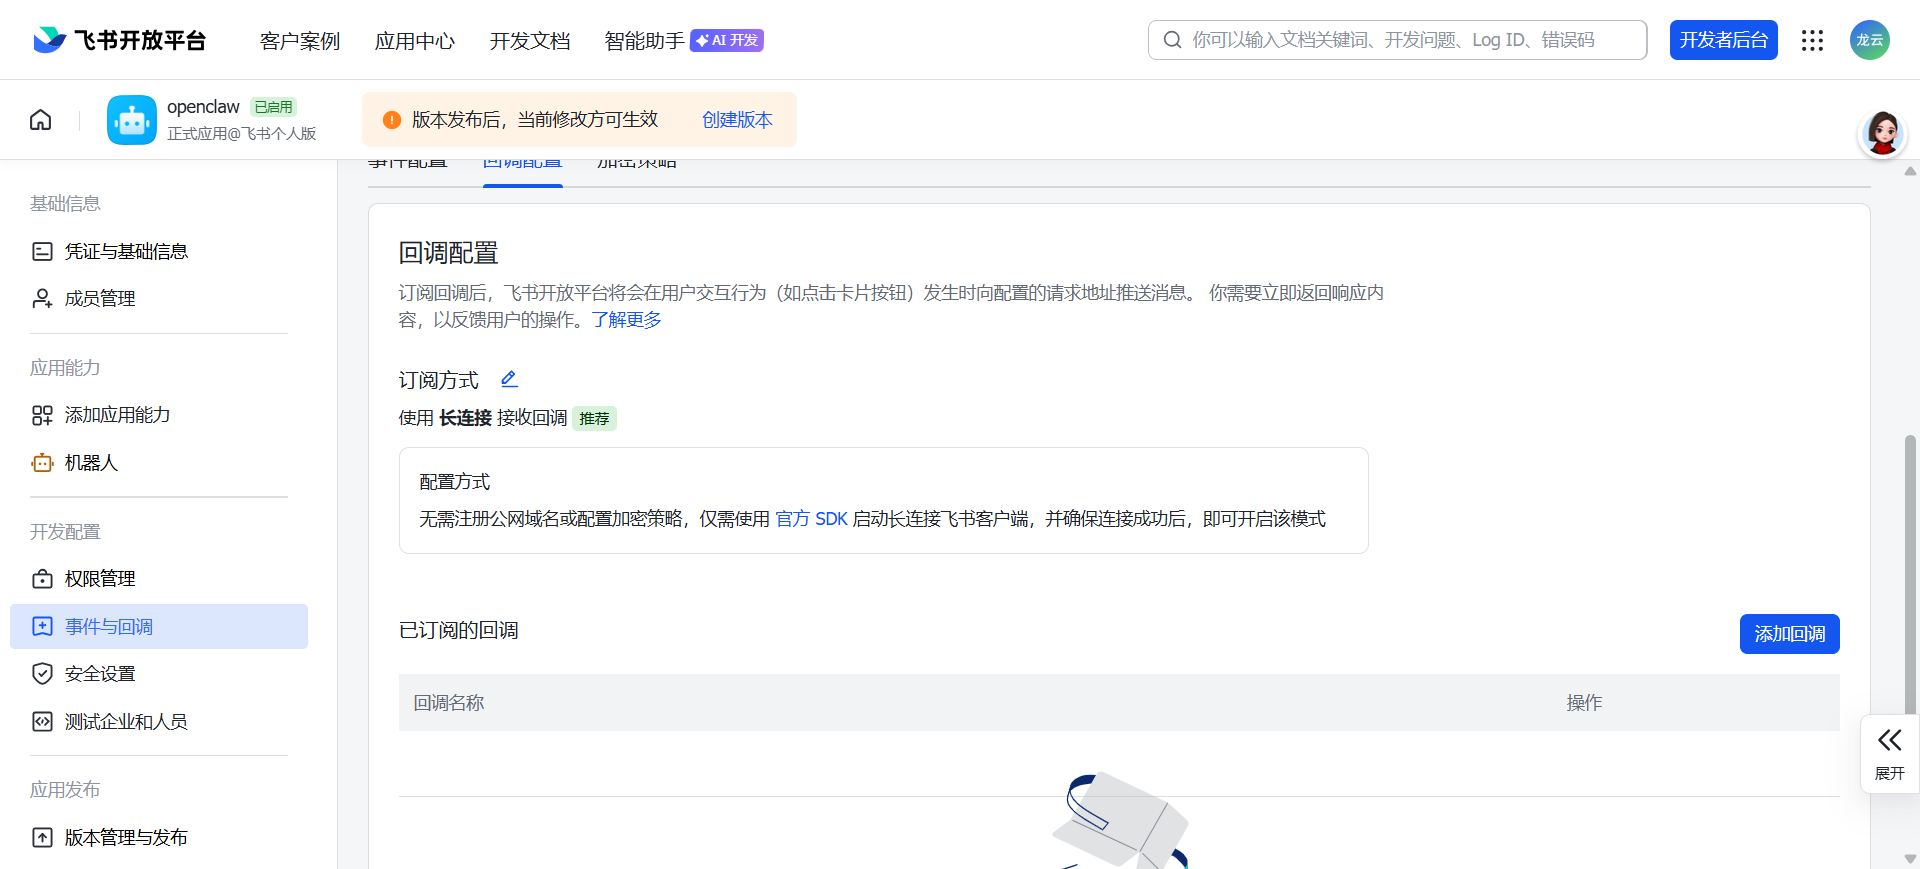
Callback Configuration
On the "Events & Callbacks - Callback Configuration" page, select "Receive Callbacks via Long Connection" as the subscription method, click Save. No need to fill in any other addresses — the configuration takes effect automatically.
Permission Configuration
On the Feishu App Management Page, find "Permission Management" in the left navigation bar and click to enter. Click the "Batch Import Permissions" button on the page to open the permission import window.
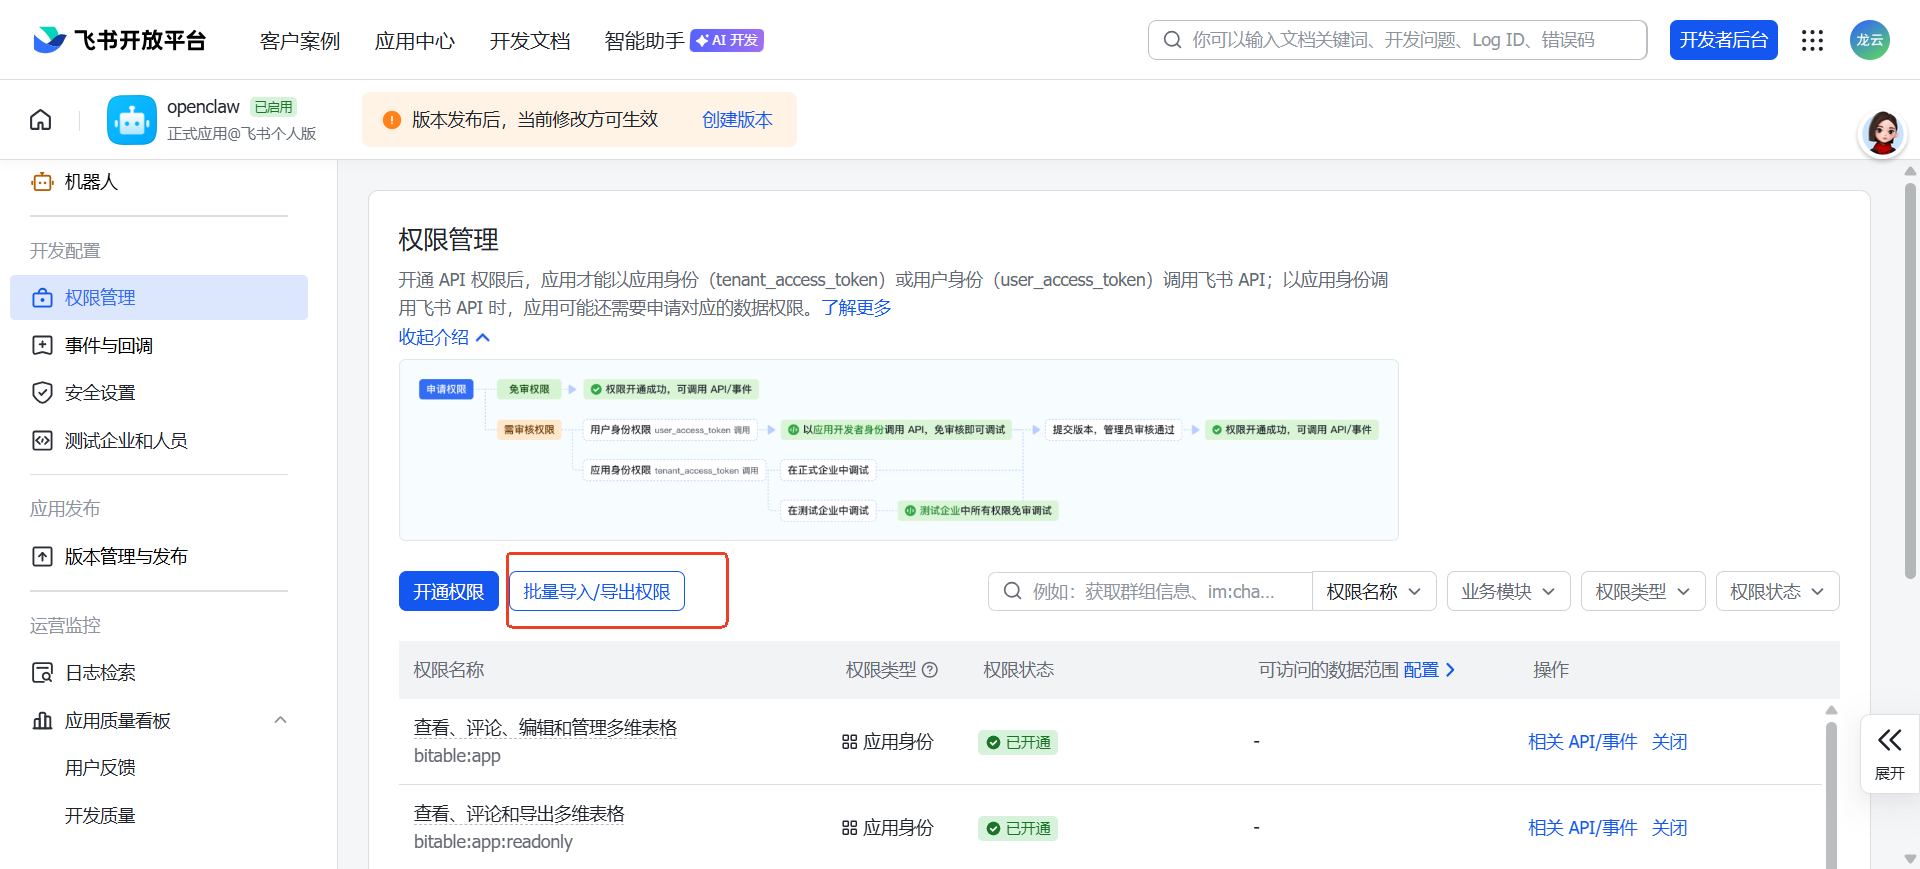
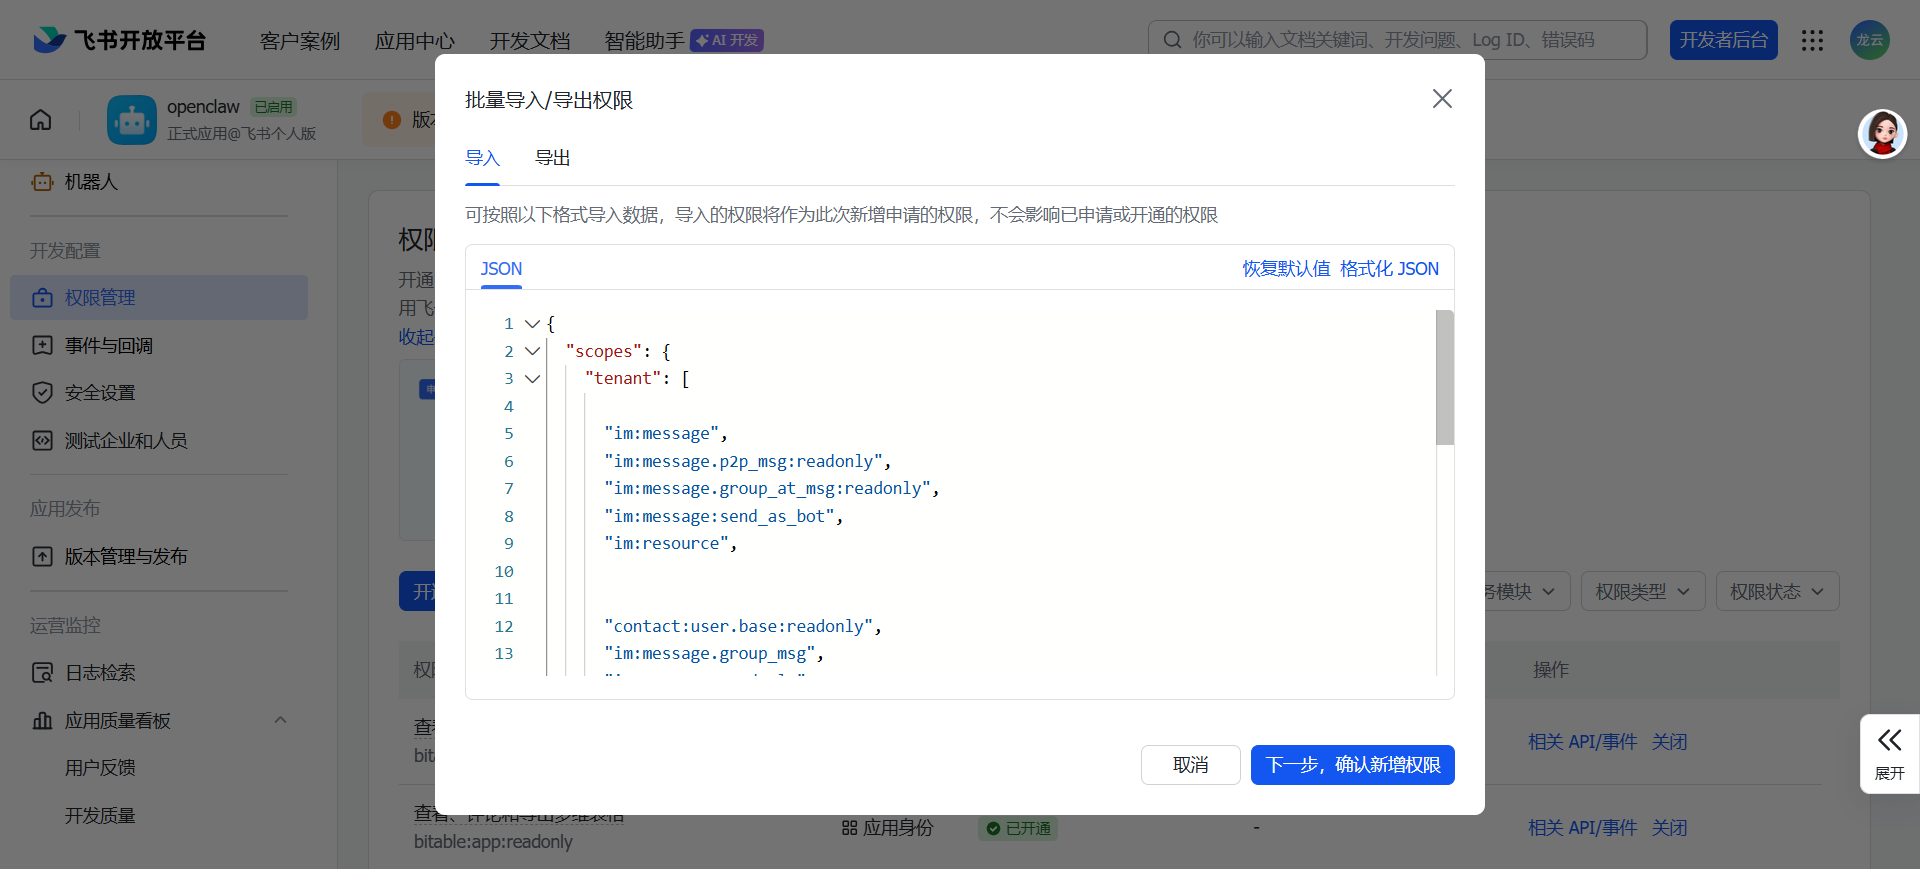
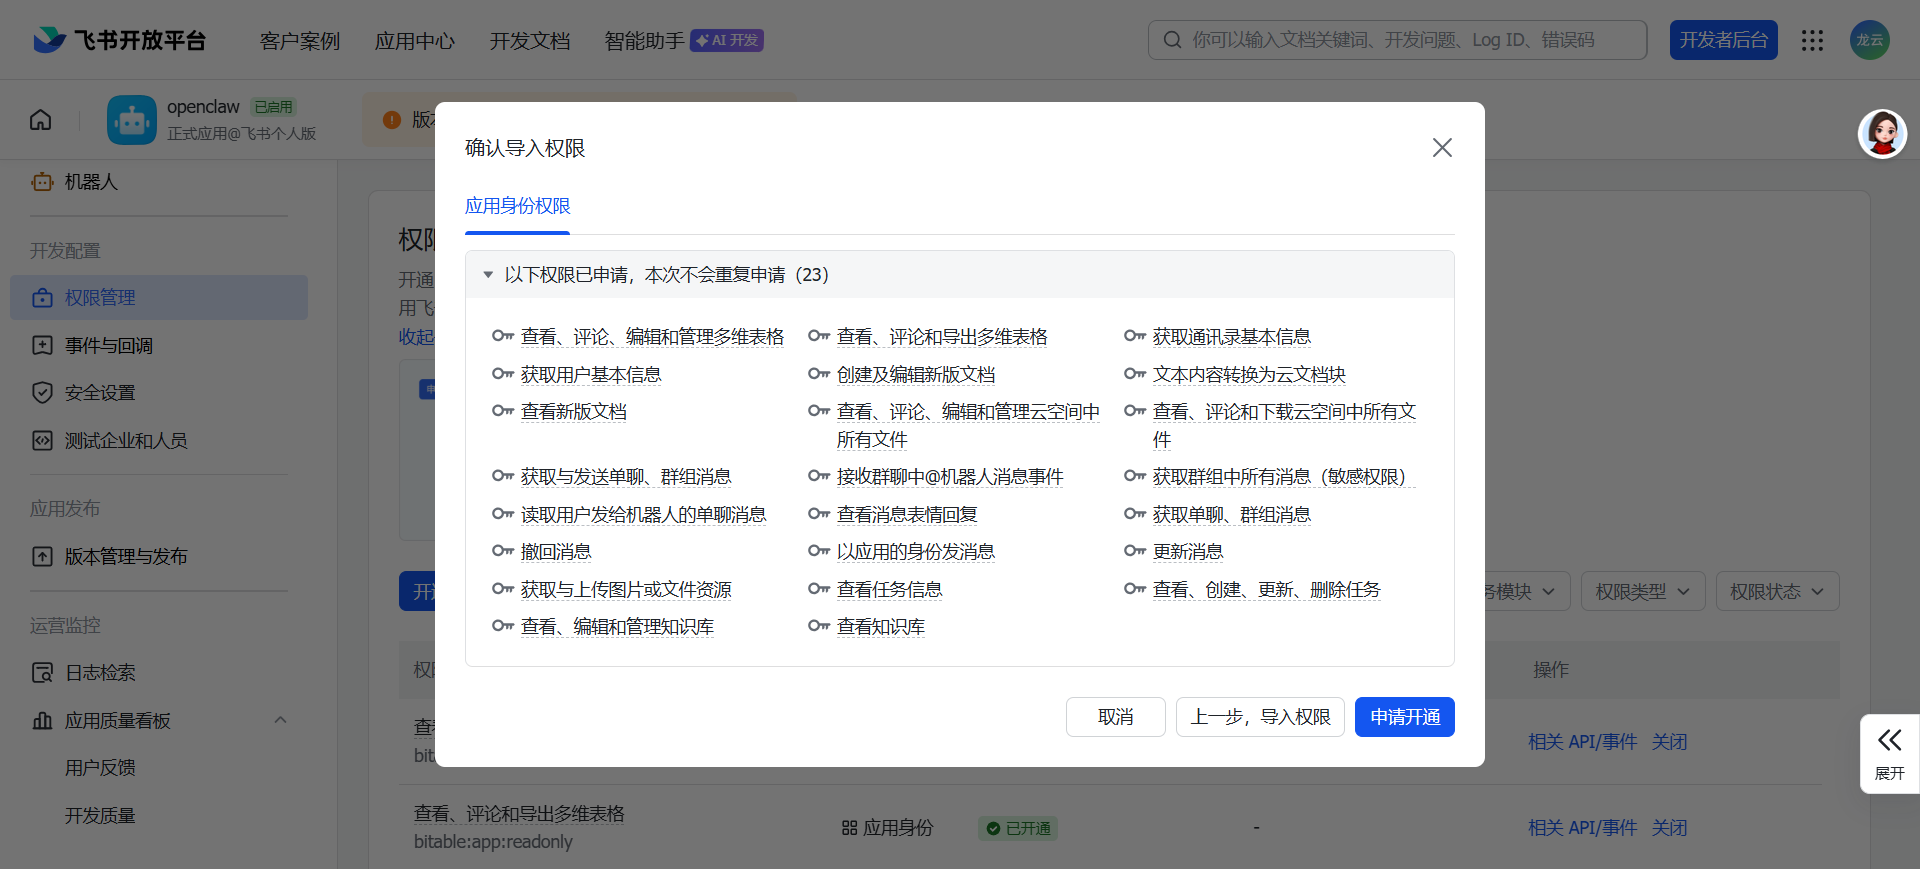
Copy the following code, replace the original JSON content in the pop-up window, click Next, confirm the new permissions, continue to apply for activation, and wait for permission import to complete.
{
  "scopes": {
    "tenant": [

      "im:message",
      "im:message.p2p_msg:readonly",
      "im:message.group_at_msg:readonly",
      "im:message:send_as_bot",
      "im:resource",


      "contact:user.base:readonly",
      "im:message.group_msg",
      "im:message:readonly",
      "im:message:update",
      "im:message:recall",
      "im:message.reactions:read",


      "docx:document:readonly",
      "drive:drive:readonly",
      "wiki:wiki:readonly",
      "bitable:app:readonly",
      "task:task:read",

      "contact:contact.base:readonly",
      "docx:document",
      "docx:document.block:convert",
      "drive:drive",
      "wiki:wiki",
      "bitable:app",
      "task:task:write"
    ],
    "user": []
  }
}
After permission import is complete, you can view the successfully imported permissions in the permission list.
Tip: You can also adjust permission settings as needed during subsequent use of the Feishu bot.
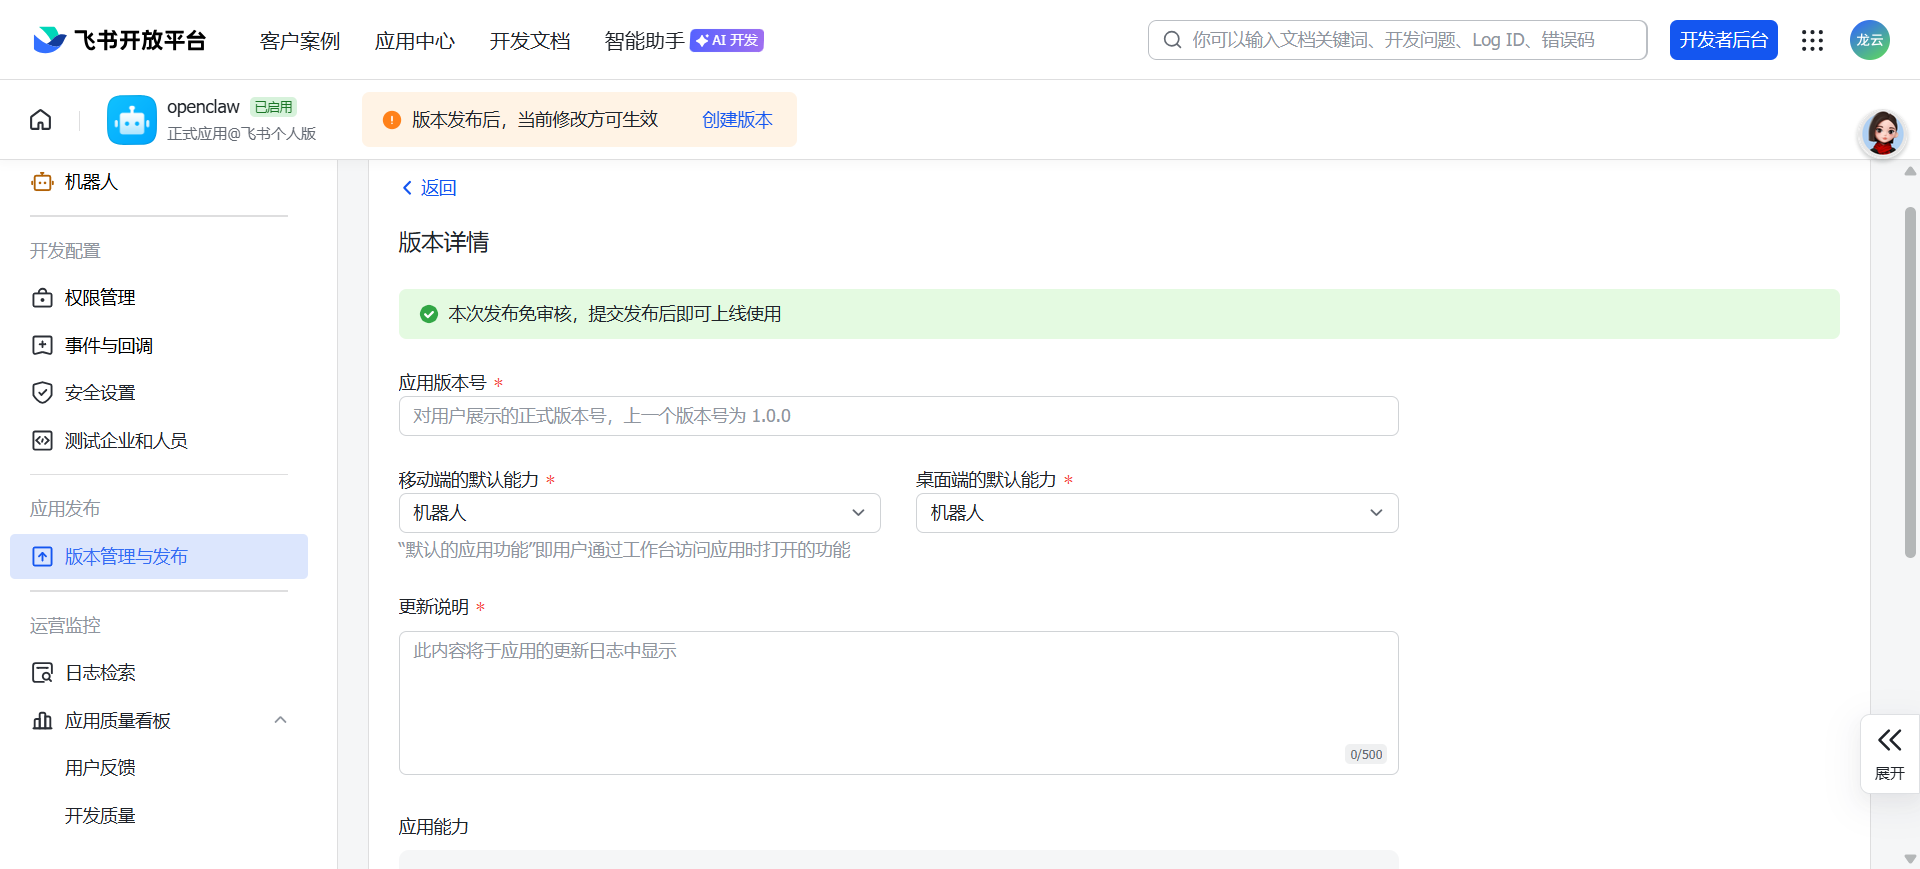
Create Version and Publish
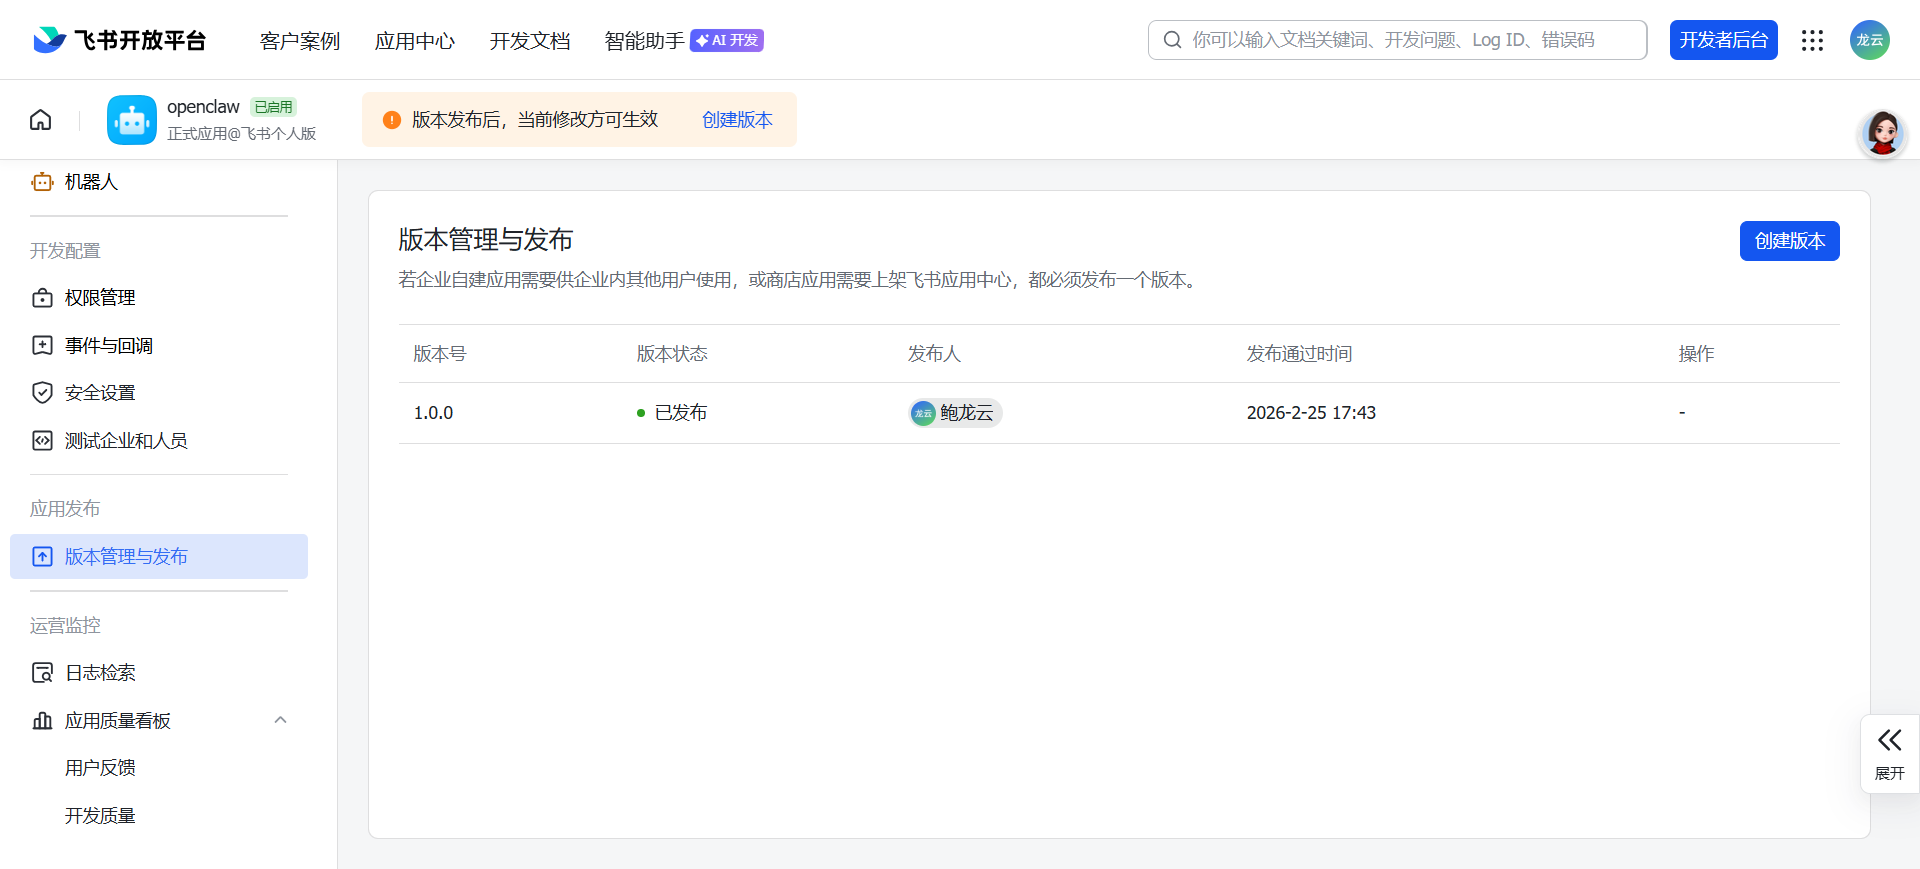
On the Feishu App Management Page, find "Version Management & Publishing" in the left navigation bar and click to enter. Click Create Version in the upper right corner.
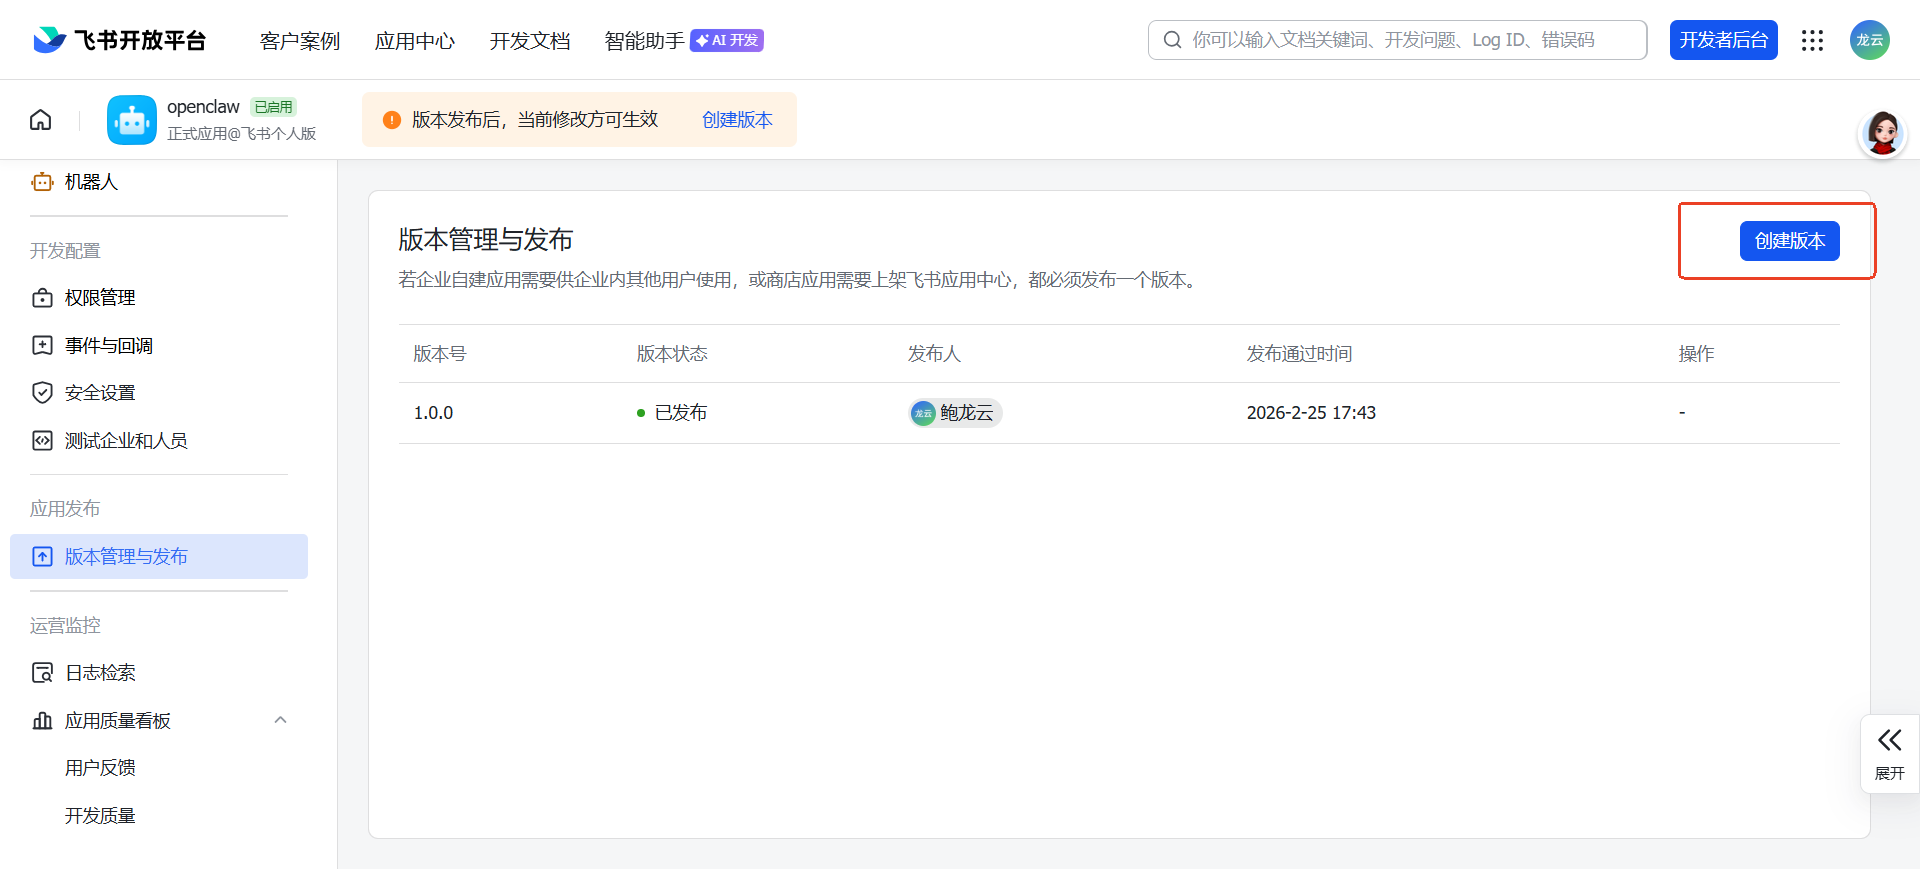
Fill in the app version number (e.g., 1.0.0 — you can define your own version number) and update notes, then click Save and Confirm Publish.
Wait for the Feishu administrator to approve the publication (personal accounts don't require review). After successful publication, you can view the published version number and status on the "Version Management & Publishing" page.
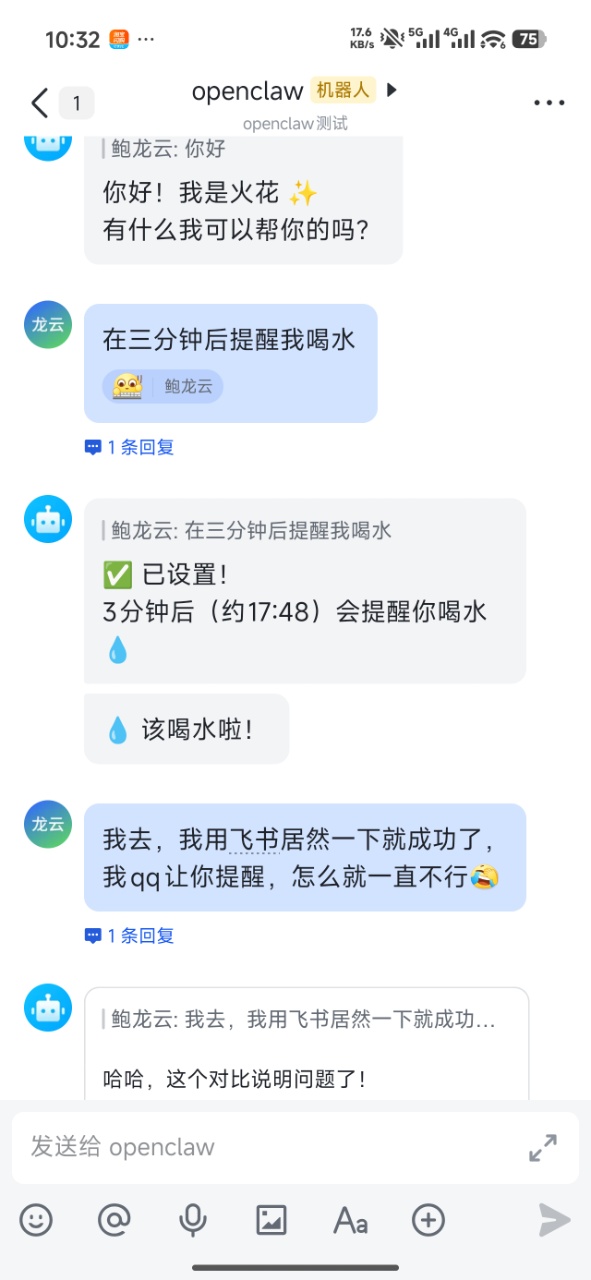
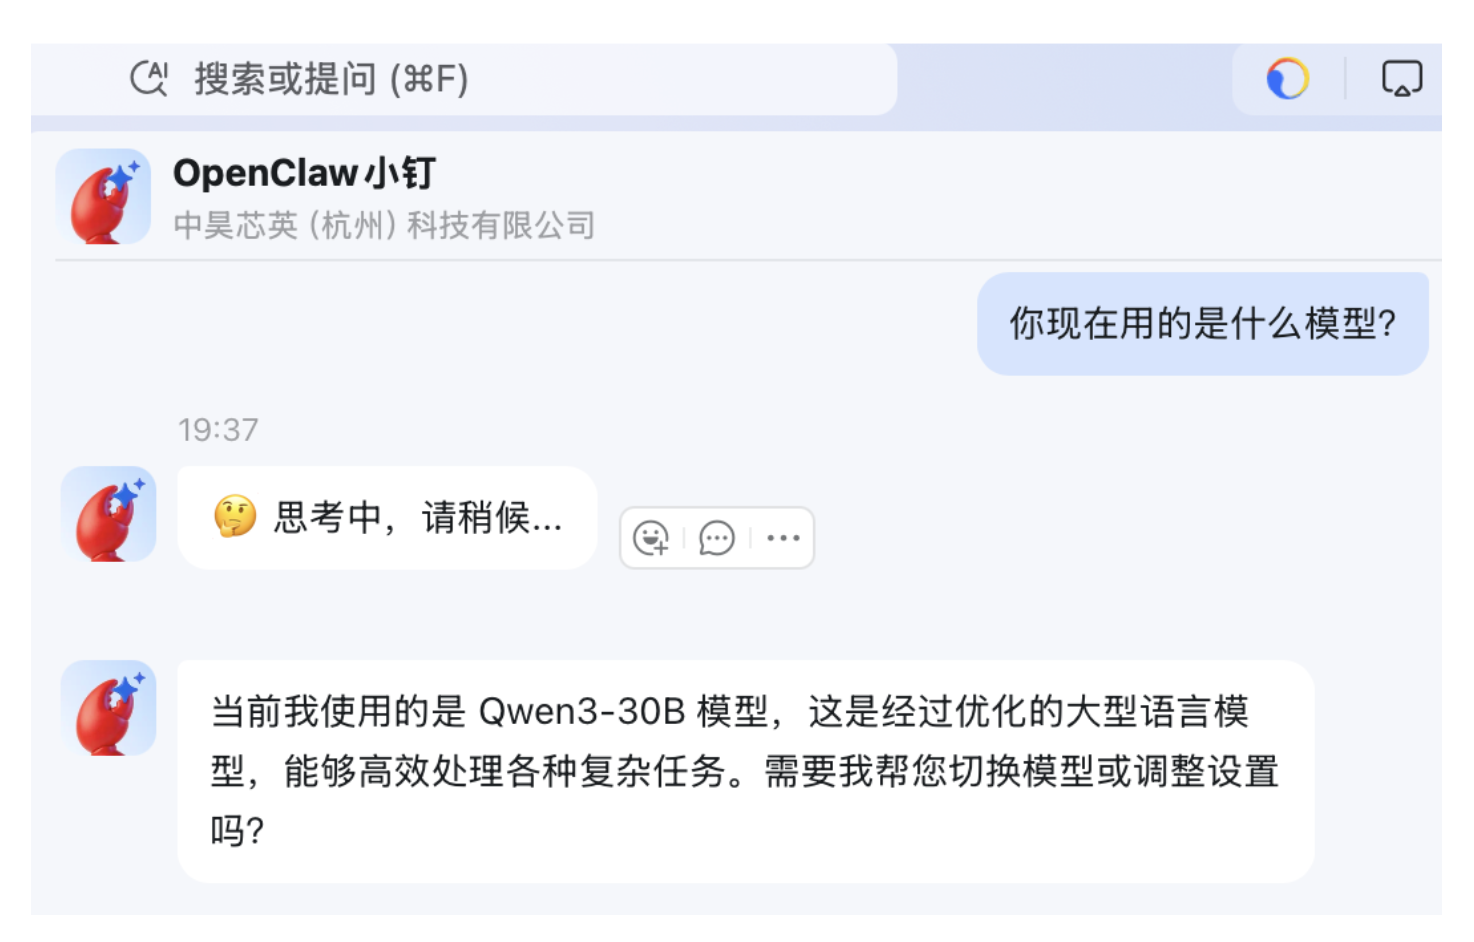
Interact with the Feishu Bot
After completing the above steps, you can chat privately with the Feishu bot, or add the Feishu bot to group chats.
Private Chat
Using the Feishu mobile app as an example (the desktop version operates similarly), log in to Feishu and tap the search bar.
In the search bar, enter the app name of the Feishu bot created and published in the previous steps, then press Enter to search.
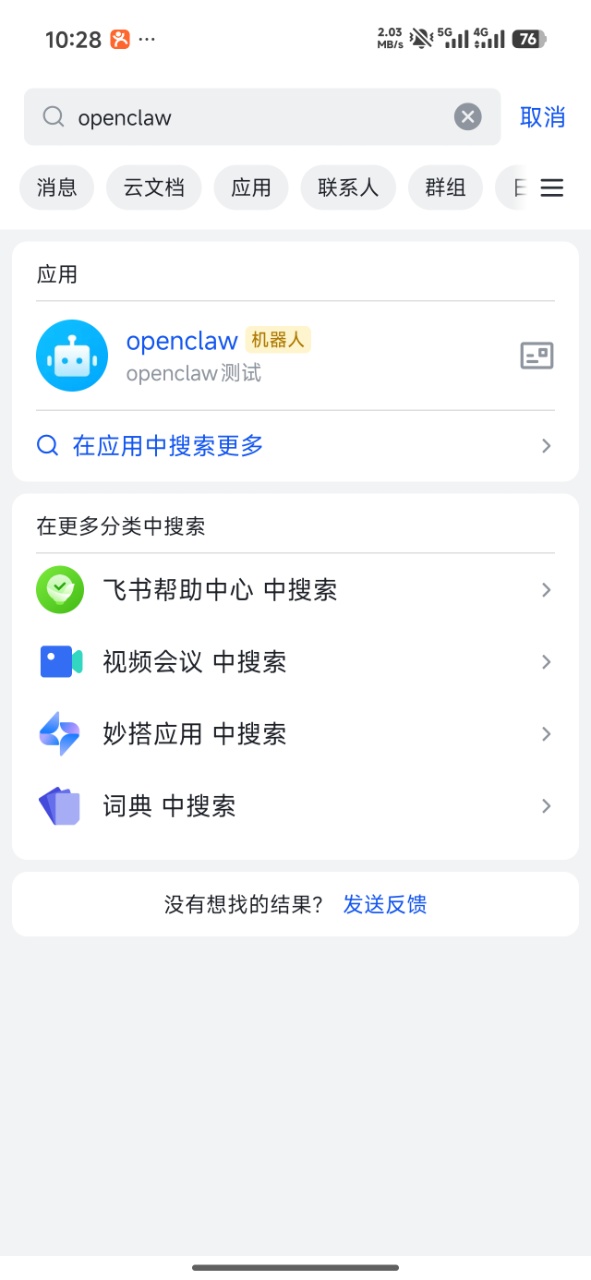
Click on the found bot to enter the private chat page, and you can start chatting with the Feishu bot that has been connected to OpenClaw.